

Setting up an Anaplan Connection
How to Set Up an Anaplan Connection Anaplan is a leading planning platform that empowers organizations to drive business performance with real-time data modeling, forecasting, and scenario planning. Nexadata integrates directly with Anaplan, allowing you to create live data pipelines between the two platforms for efficient and collaborative planning workflows. For a summary of everything the connector supports, see the Anaplan integration page.
Here are the key features:
-
Secure Basic Authentication: Connect securely using your Anaplan username and password credentials.
-
Pre-filled Endpoints: Default Anaplan endpoints are provided for standard environments. If your instance is hosted in a custom cloud infrastructure, endpoints can be updated accordingly.
-
Connection Validation: Fields are validated before submission to ensure a successful connection to the Anaplan platform.
Step-by-Step Instructions
Section titled “Step-by-Step Instructions”Step 1: Add a Connection
Section titled “Step 1: Add a Connection”From the Nexadata home screen, click the Create a Connection tile or navigate to Setup → Connections and click the Create Connection button in the upper-right corner. The Create New Connection form will open.
-
Provide a unique Name for your Anaplan connection. This name must clearly identify the connection within your organization.
-
Select Anaplan as the Connection Type from the dropdown menu.
Step 2: Choose Authentication Type
Section titled “Step 2: Choose Authentication Type”Under Auth type, select Basic Authentication or OAuth
Step 3: Enter Your Anaplan Credentials
Section titled “Step 3: Enter Your Anaplan Credentials”Basic Authentication
Section titled “Basic Authentication”Provide the following credentials:
-
Username: Your Anaplan account username
-
Password: Your Anaplan account password
All credential information is securely encrypted in Nexadata’s secrets manager.
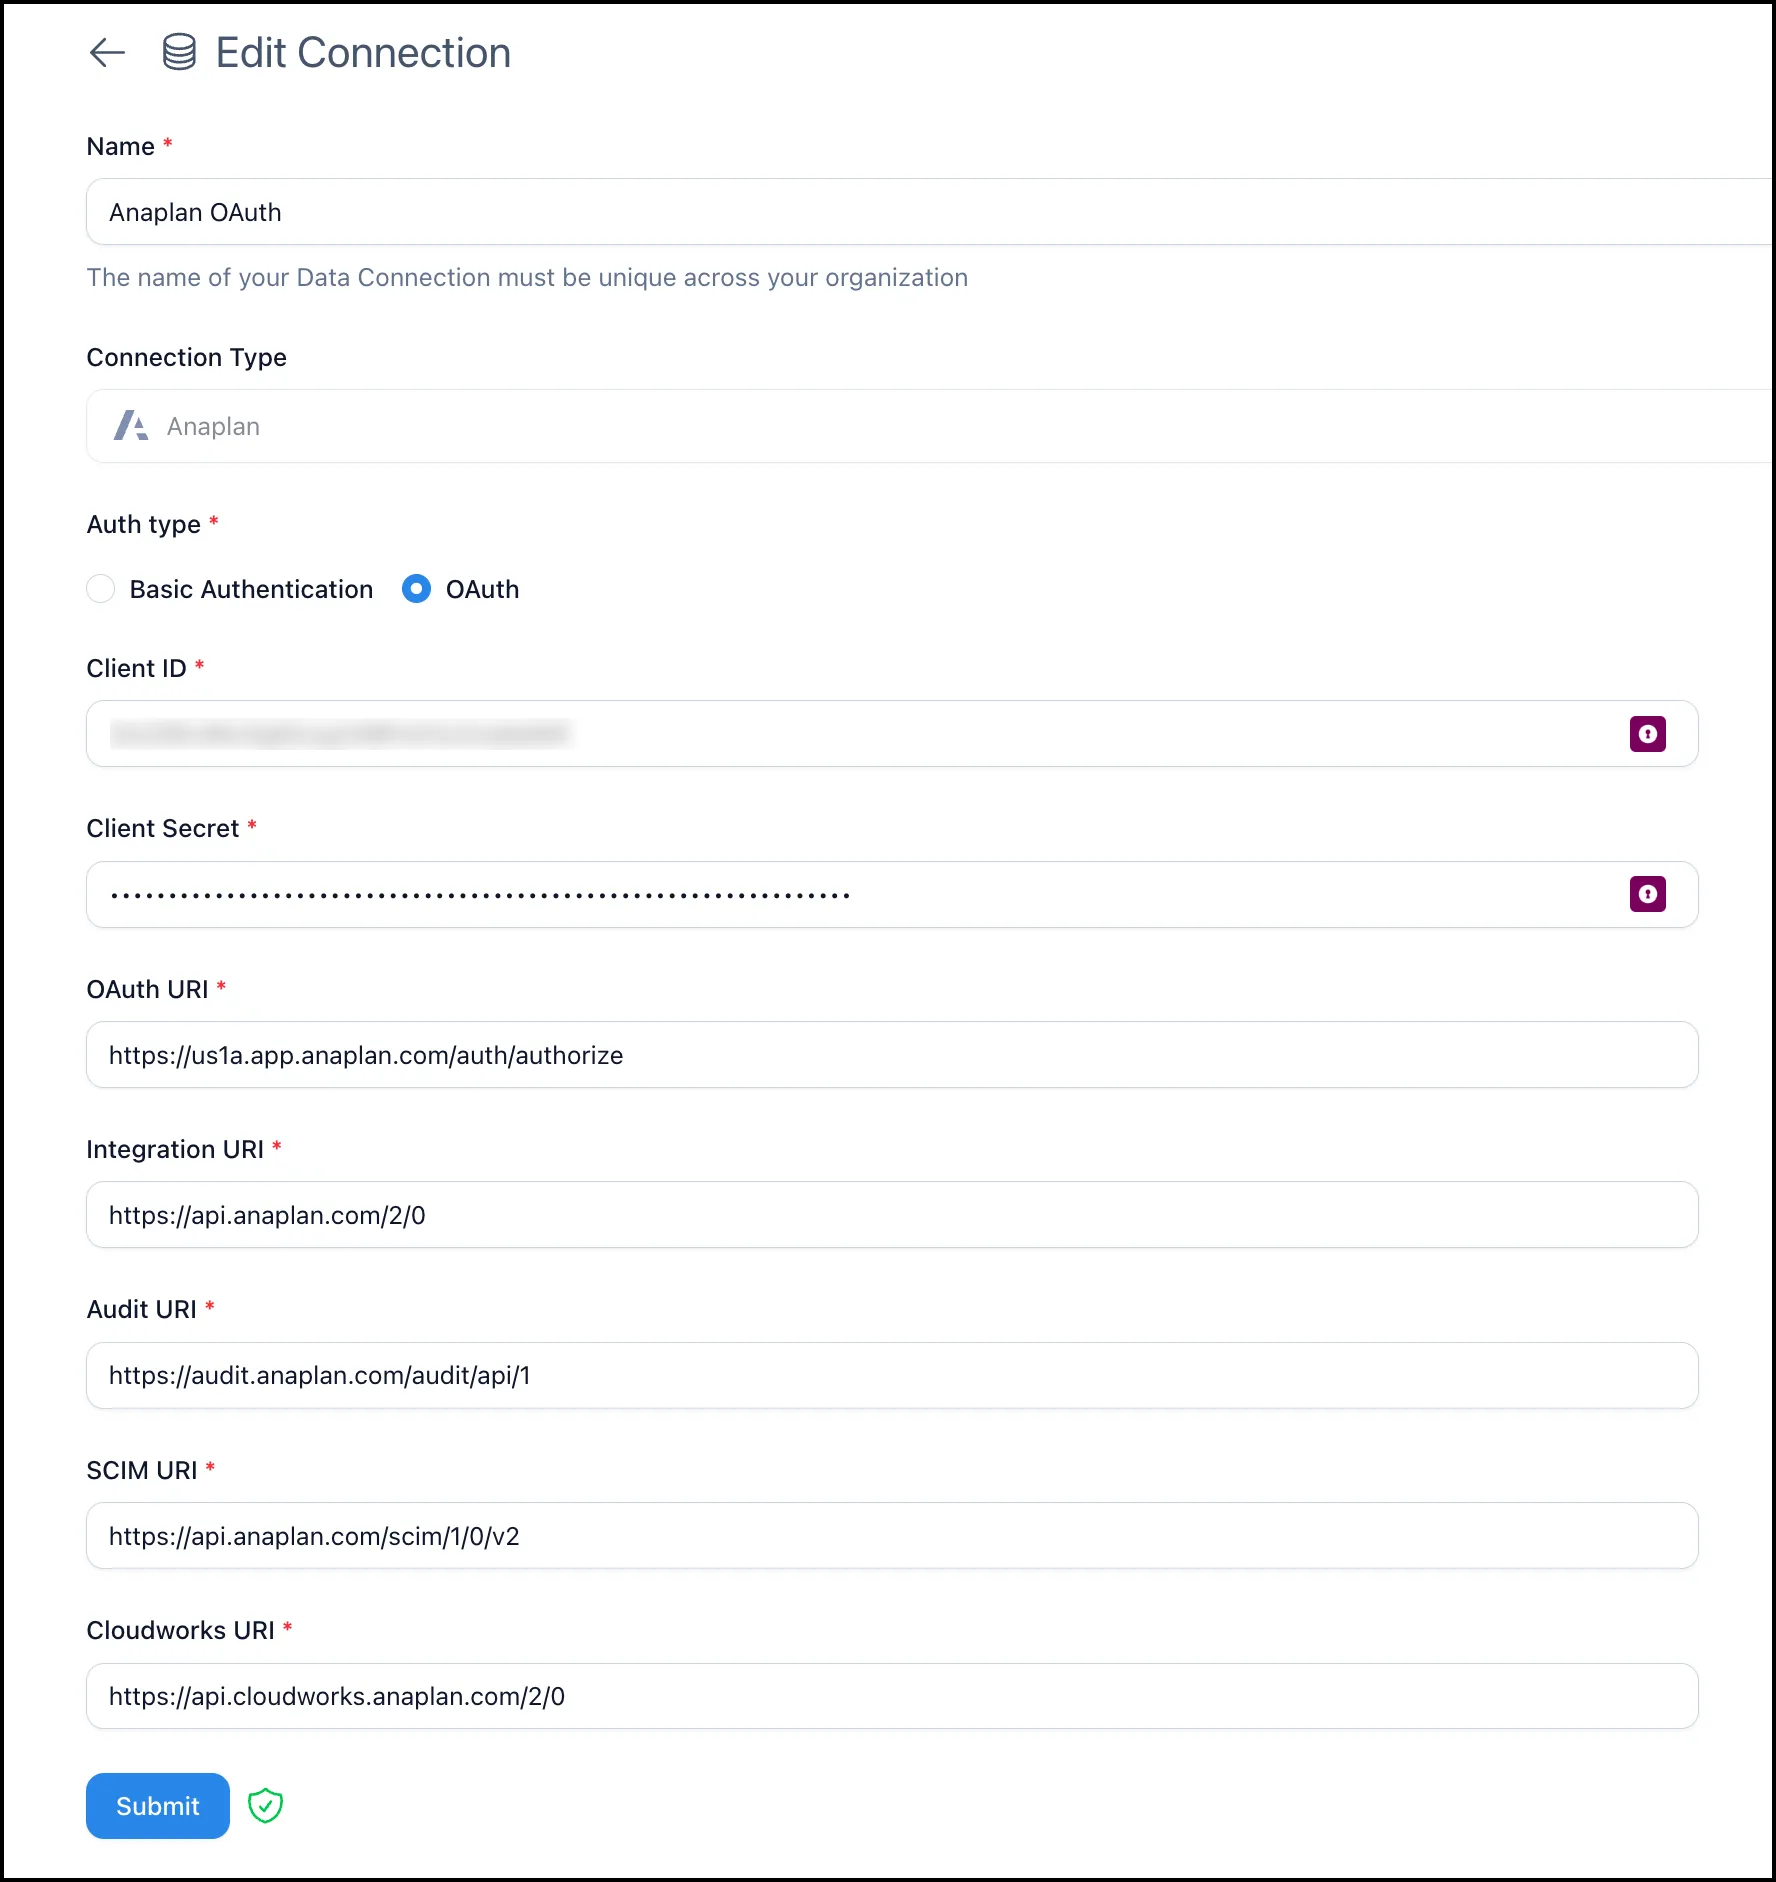
Please provide the following details from your Anaplan tenant’s Authorization Code Grant setup. For more information, refer to Anaplan’s official documentation.
-
Client ID
-
Client Secret
When you create the Authorization Code Grant OAuth client in Anaplan, enter the Nexadata callback URL in the Allowed callback URLs field exactly as shown:
https://app.nexadata.com/anaplan/oauth/callback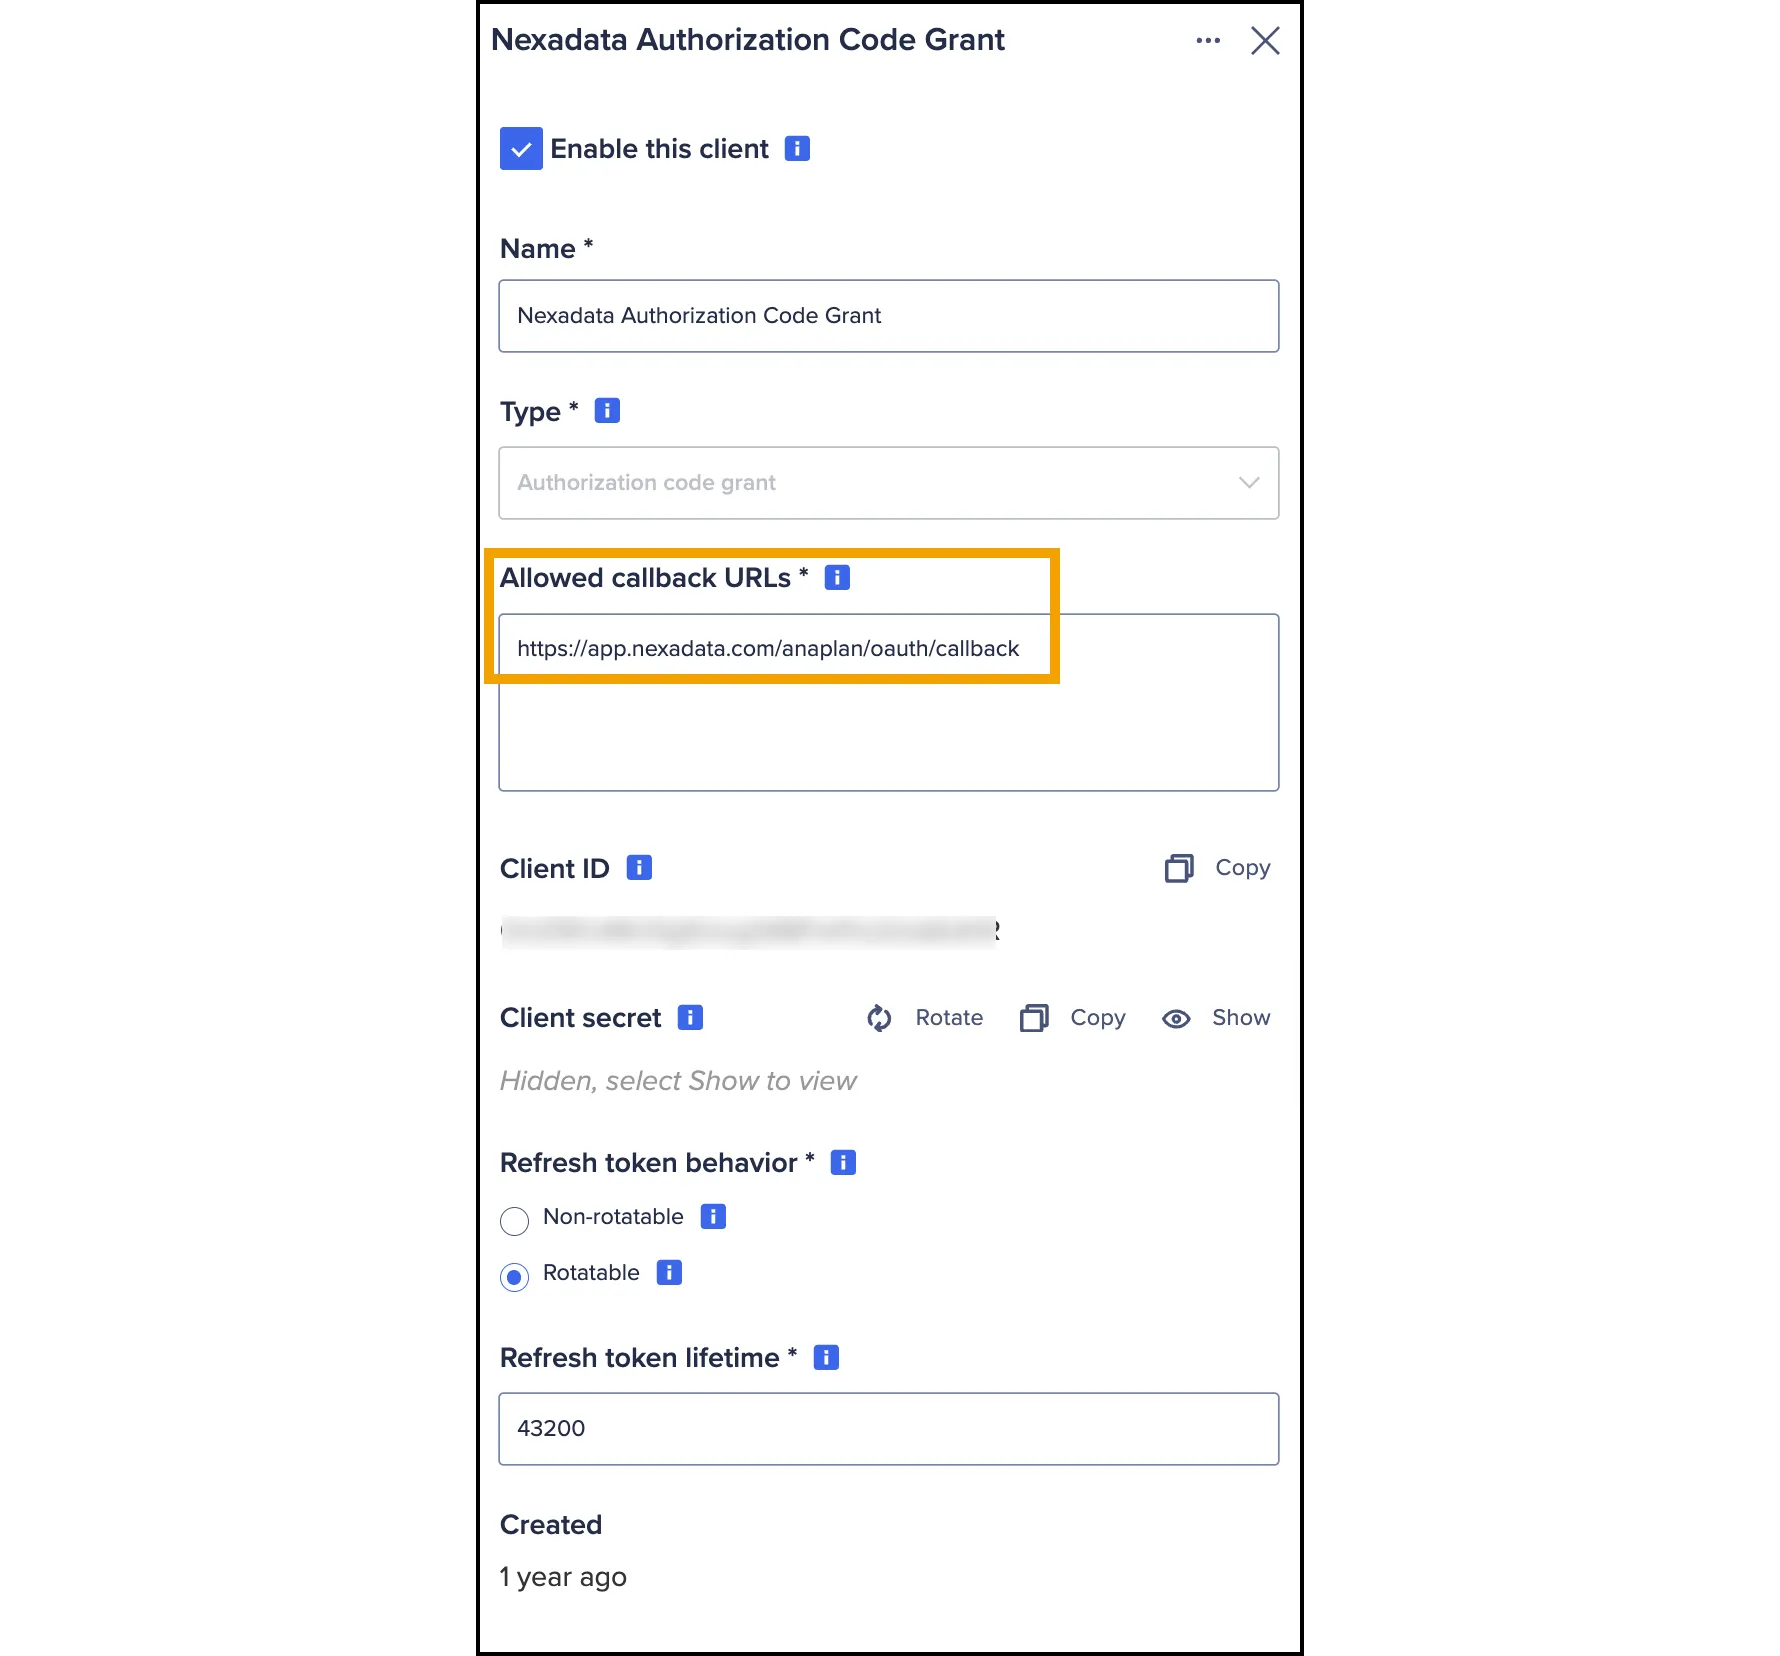
Step 4: Review Anaplan URIs
Section titled “Step 4: Review Anaplan URIs”The following URIs are pre-filled for standard Anaplan cloud environments:
-
Authentication URI: https://auth.anaplan.com (if using basic authentication)
-
OAuth URI: https://us1a.app.anaplan.com/auth/authorize (if using OAuth)
-
Integration URI: https://api.anaplan.com/2/0
-
Audit URI: https://audit.anaplan.com/audit/api/1
-
SCIM URI: https://api.anaplan.com/scim/1/0/v2
-
Cloudworks URI: https://api.cloudworks.anaplan.com/2/0
Note: If your Anaplan instance is hosted in a different cloud infrastructure (e.g., a private or region-specific cloud), you may need to replace these default URIs with the appropriate values provided by your Anaplan administrator.
Step 5: Submit the Connection
Section titled “Step 5: Submit the Connection”After all fields are completed:
-
Click Submit to create your connection.
-
The system will validate your credentials and endpoint configuration.
Once successful, your Anaplan connection will be ready to use across Nexadata workflows.
Basic Authentication
Section titled “Basic Authentication”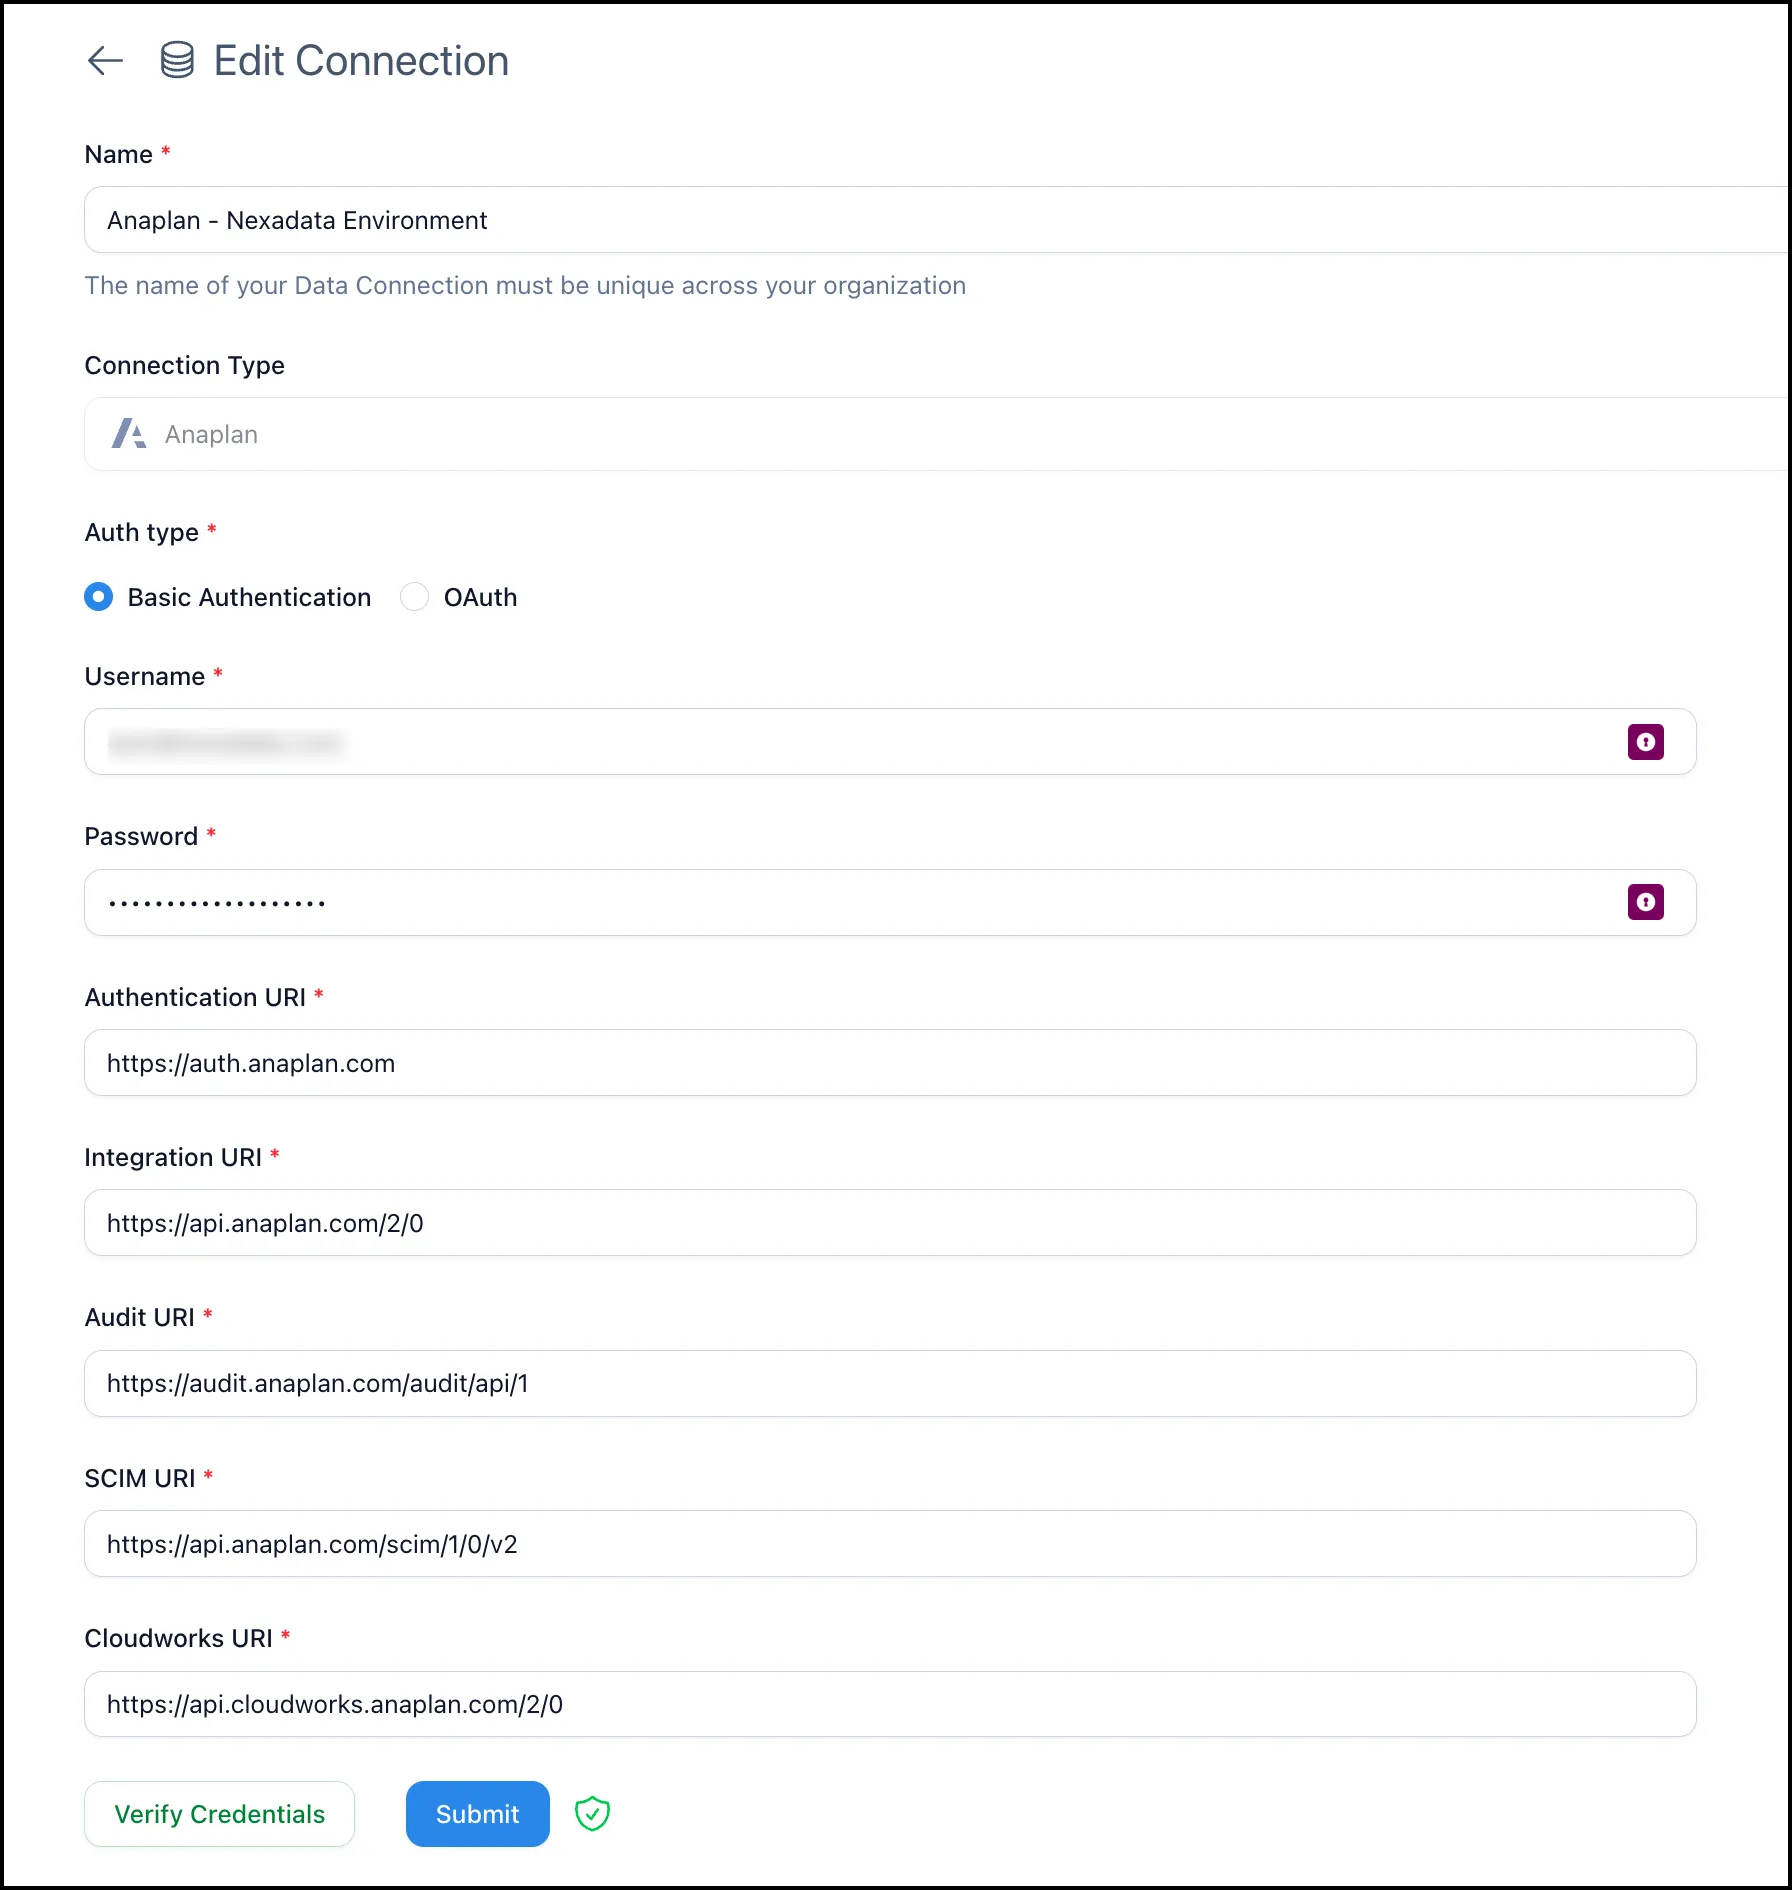
Troubleshooting Tips
Section titled “Troubleshooting Tips”-
Login Issues? Double-check your username and password.
-
Invalid URI Errors? Confirm whether your organization uses custom Anaplan endpoints.
-
Still need help? Contact Nexadata Support or your system administrator for further assistance.