

How to Create a New Nexadata Dataset
When working with Nexadata, you can create new datasets to manage your data pipelines effectively. This guide walks you through the process of adding a new dataset, including defining the source’s name, format, and connection options.
Step-by-Step Instructions
Section titled “Step-by-Step Instructions”Step 1: Open the “Create New Dataset” Form
Section titled “Step 1: Open the “Create New Dataset” Form”-
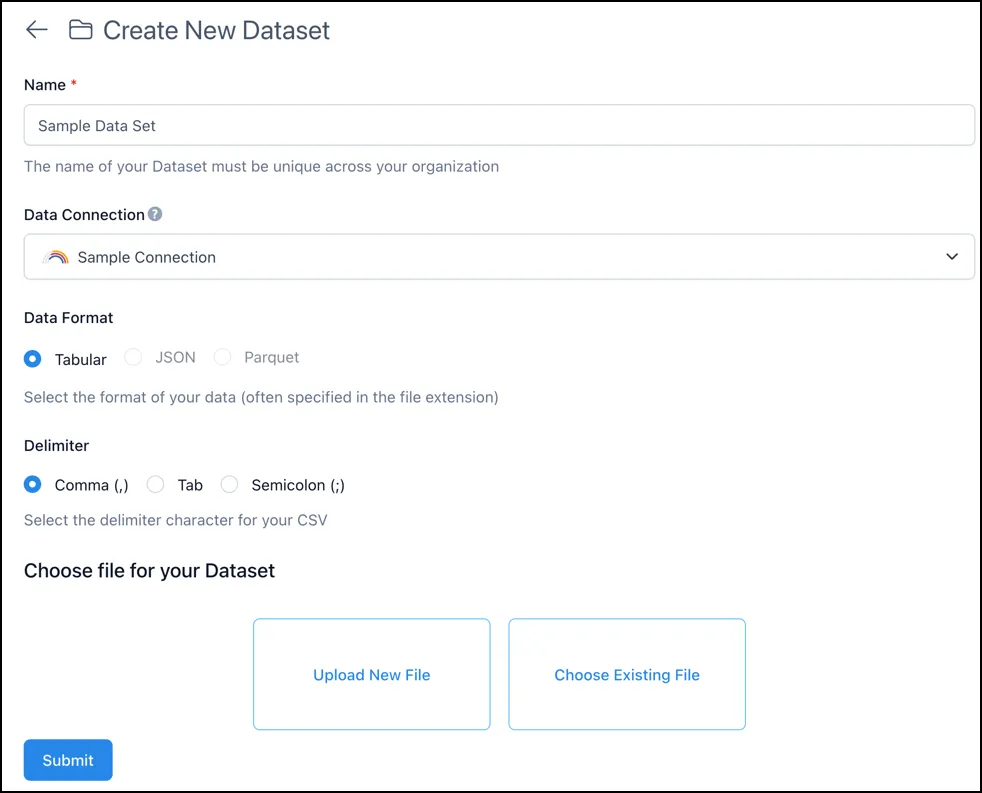
Navigate to the Nexadata dashboard and click on Add New Dataset.
-
This will bring up the dataset creation form.
Step 2: Enter a Name for Your Dataset
Section titled “Step 2: Enter a Name for Your Dataset”- Provide a name in the Name field. While not required, it is recommended that this name be unique.
Step 3: Select Data Connection
Section titled “Step 3: Select Data Connection”- From the Data Connection dropdown, choose the appropriate connection. You may see options like “sample data” or your organization’s available connections.
Step 4: Choose Data Format
Section titled “Step 4: Choose Data Format”-
Nexadata supports three data formats for file-based Datasets:
-
Tabular for delimited text files, including CSV (Comma-Separated Values), TSV (Tab-Separated Values), and semicolon-delimited files.
-
Spreadsheet for Excel-style workbooks (.xlsx, .xls, .xlsm). See Setting Up a Spreadsheet Dataset.
-
PDF for documents that hold their data in printed tables, such as invoices, statements, and reports. Selecting PDF adds a Process PDF step to this form. See Setting Up a PDF Dataset.
-
-
For a fuller explanation of each format and how the form changes with your choice, see Supported Data Formats in Nexadata.
Step 5: Specify Details Based on the Data Connection
Section titled “Step 5: Specify Details Based on the Data Connection”Please see this article on supported Nexadata connections.
Step 6: Submit the Form
Section titled “Step 6: Submit the Form”-
Once all fields are filled, click the Submit button at the bottom of the form.
-
Nexadata will now register your new dataset.
Troubleshooting
Section titled “Troubleshooting”-
If the S3 Bucket or S3 Path fields are not populating, ensure that your AWS permissions are correctly configured.
-
Double-check your data file for any formatting issues (e.g., using the wrong delimiter for CSV files).