

Using an SFTP Connection
Once your SFTP connection is successfully configured in Nexadata, you can begin using it to ingest external files into Datasets or export pipeline outputs back to the SFTP server. This guide walks through both processes with step-by-step instructions and visuals.
Here are the key capabilities:
-
Import tabular data (CSV or TXT) from your SFTP server.
-
Export pipeline results to SFTP using:
-
Dynamic output (adds a timestamp to the filename)
-
Static output (overwrites the same file)
-
-
Search and browse files on your SFTP server connection.
-
Customize paths and formats to suit your workflow.
Let’s walk through both setup processes.
Part 1: Creating a Dataset from an SFTP Server
Section titled “Part 1: Creating a Dataset from an SFTP Server”Use this process to ingest data stored on your SFTP server into Nexadata as a Dataset.
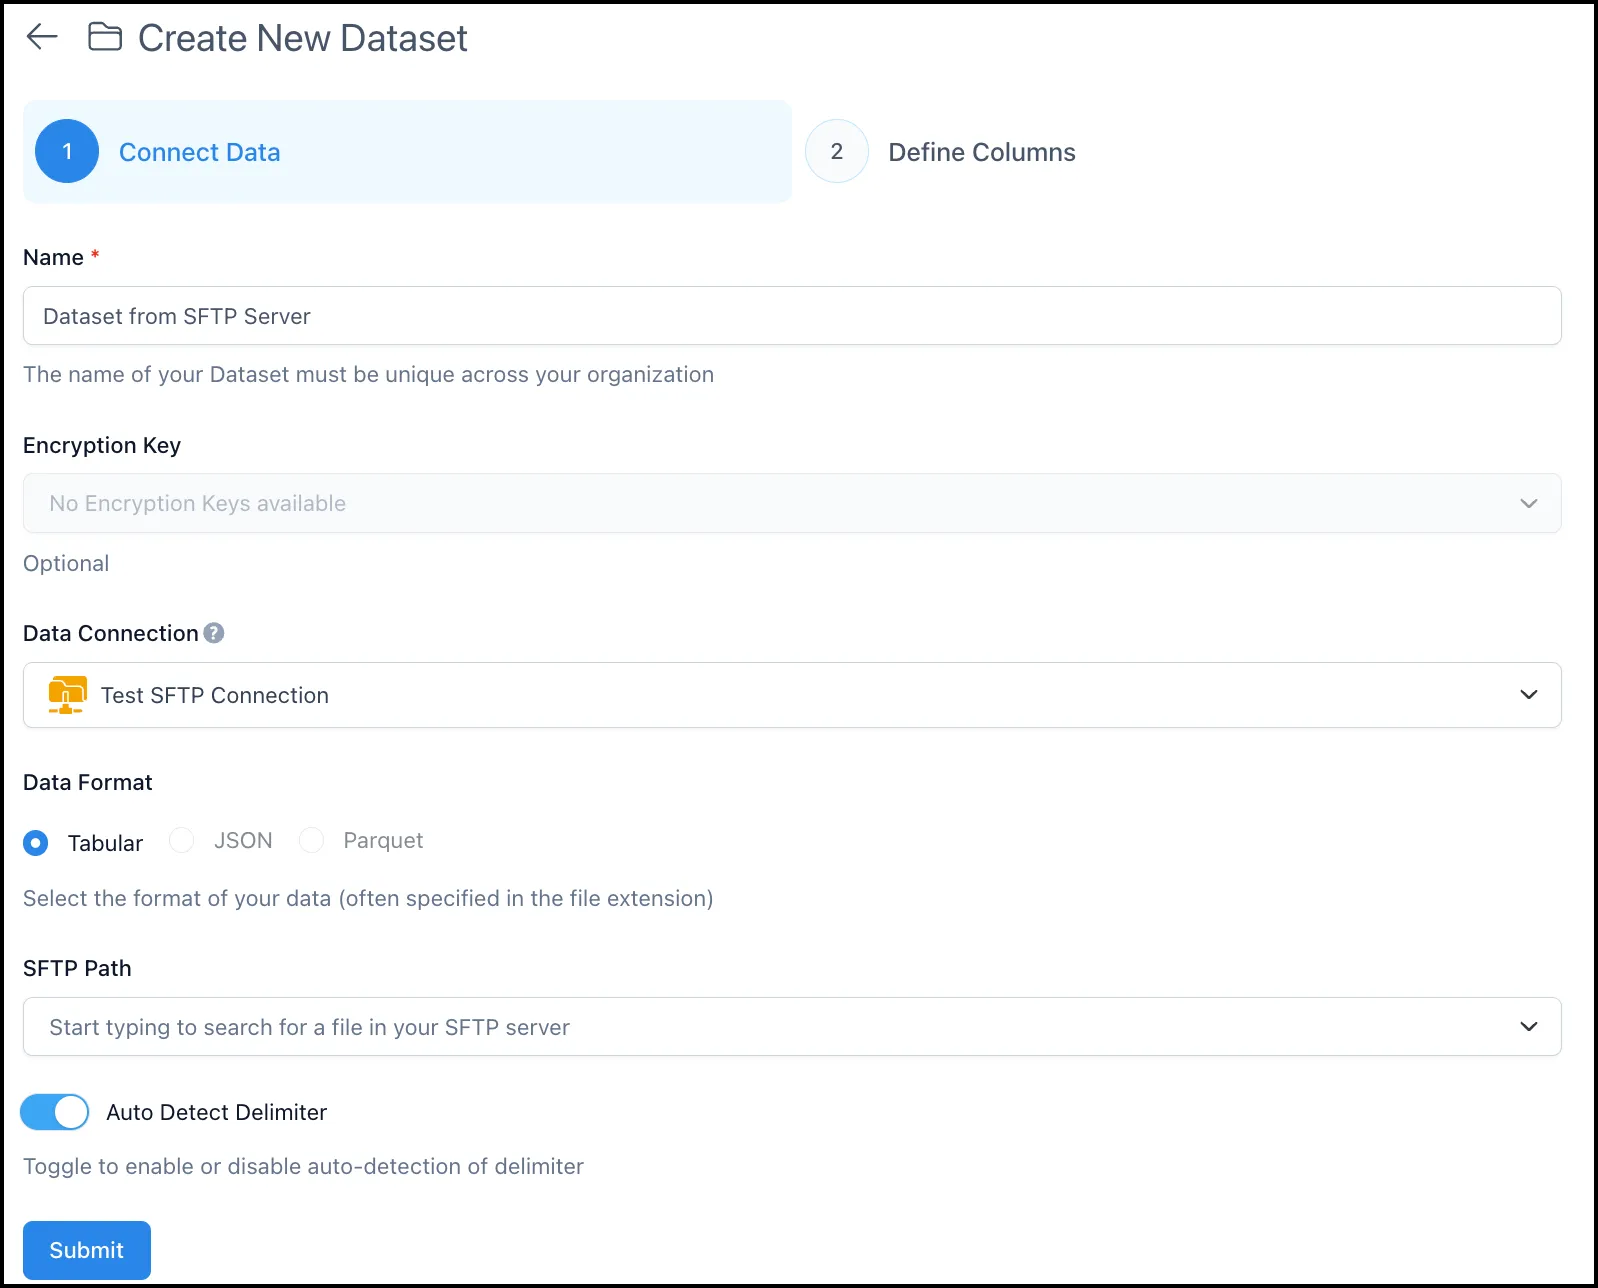
Step 1: Create a New Dataset
Section titled “Step 1: Create a New Dataset”-
Go to the Datasets section in Nexadata.
-
Click Create Dataset.
-
Under Data Connection, select your configured SFTP connection (e.g.,
Test SFTP Connection).
Step 2: Configure Dataset Properties
Section titled “Step 2: Configure Dataset Properties”-
Name: Provide a unique name for the dataset.
-
Data Connection: Ensure the correct SFTP connection is selected.
Step 3: Select Data Format
Section titled “Step 3: Select Data Format”Choose the format of your file stored on the SFTP server:
-
Tabular (CSV or TXT)
-
JSON (coming soon)
-
Parquet (coming soon)
Step 4: Specify SFTP Path
Section titled “Step 4: Specify SFTP Path”-
Begin typing in the SFTP Path field to search your SFTP server for available files.
-
Select the desired file for ingestion.
Step 5: Set or Auto-Detect Delimiter
Section titled “Step 5: Set or Auto-Detect Delimiter”For tabular files, choose to auto-detect the delimiter or manually select one (Comma, Tab, Semicolon, Pipe).
📌 Auto-detection is enabled by default.
Step 6: Submit the Dataset
Section titled “Step 6: Submit the Dataset”-
Review your configuration.
-
Click Submit to create the dataset.
Your dataset is now ready to be used in Nexadata pipelines.
Part 2: Configuring an SFTP Output in a Pipeline
Section titled “Part 2: Configuring an SFTP Output in a Pipeline”After a pipeline completes in Nexadata, you can write the transformed results back to an SFTP destination.
Step 1: Add an Output to the Pipeline
Section titled “Step 1: Add an Output to the Pipeline”-
Navigate to the Customized Outputs section under the Pipeline Setup tab.
-
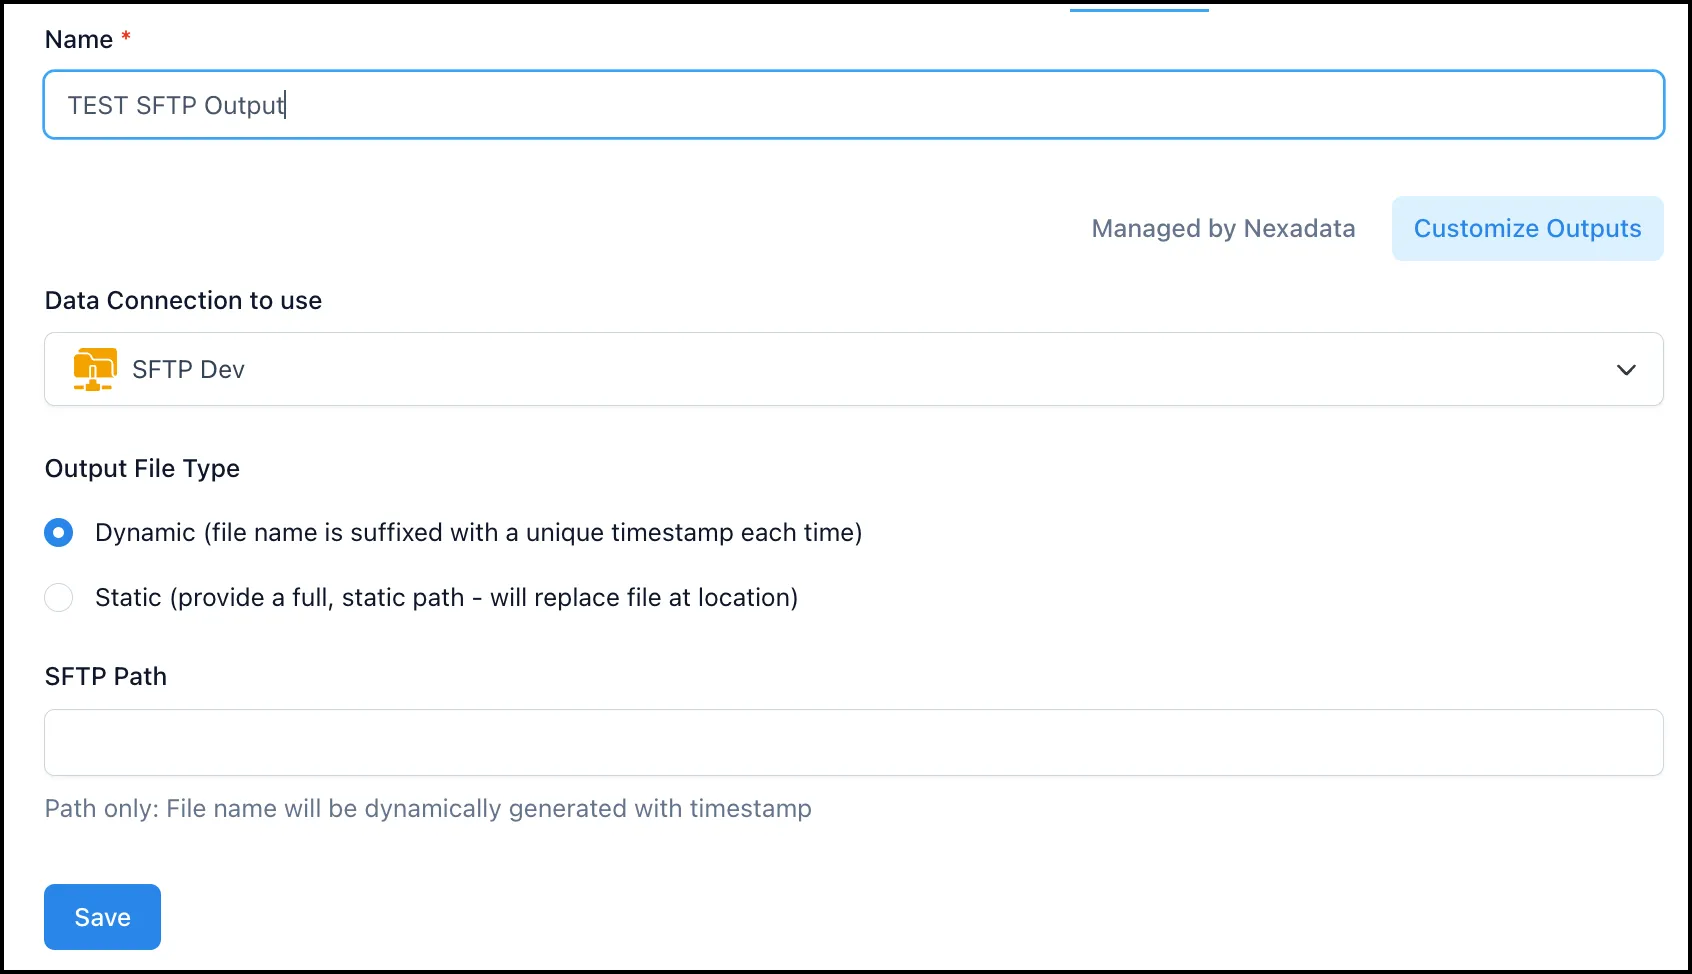
Click Add Output and select your configured SFTP connection.
📸 Insert Screenshot 1 here (SFTP Output Configuration with Name, Connection, and File Type)
Step 2: Choose Output File Type
Section titled “Step 2: Choose Output File Type”-
Dynamic (recommended): Adds a timestamp to each file.
-
Static: Replaces the file at the specified SFTP path every time.
📌 Use Dynamic for versioned outputs and Static for overwriting a fixed file location.
Step 3: Provide SFTP Path
Section titled “Step 3: Provide SFTP Path”-
In the SFTP Path field, enter the full directory path.
-
For Dynamic outputs, the file name is generated automatically with a timestamp.
-
For Static outputs, include the full file name (e.g.,
processed_data.csv).
-
Step 4: Save the Output
Section titled “Step 4: Save the Output”Click Save to register the output configuration with your pipeline.
Tips and Best Practices
Section titled “Tips and Best Practices”-
✅ Dynamic Outputs are ideal for preserving pipeline history with timestamped files.
-
⚠️ Use Static Outputs only when overwriting is acceptable.
-
🔐 Ensure the appropriate SFTP permissions are in place to read/write files.
-
📁 Organize SFTP paths by project or pipeline for easier navigation.
-
📊 Always verify the file format and delimiter before importing tabular data.