Step 8 - Create an Import Action in Anaplan
🔍 What You’re Doing
Section titled “🔍 What You’re Doing”You are importing a two-column CSV from Nexadata that contains:
-
CompanyName (child list items)
-
Segment (parent list items)
Anaplan allows you to create both the child list items and their parents directly in this import mapping screen. You do not need to pre-create parent list items or a separate parent list import.
✅ Summary of Steps
Section titled “✅ Summary of Steps”1. Start an Import into the Target List
Section titled “1. Start an Import into the Target List”From your list (e.g., Segment List or Company List):
-
Go to Data → Import…
-
Upload your Nexadata file (e.g.,
segment-hierarchy.csv)
2. Map the Source Columns to Build the Hierarchy
Section titled “2. Map the Source Columns to Build the Hierarchy”-
Column 1: CompanyName → Name
-
Column 2: Segment → Parent
This creates the parent list items and assigns each company to the correct Segment.
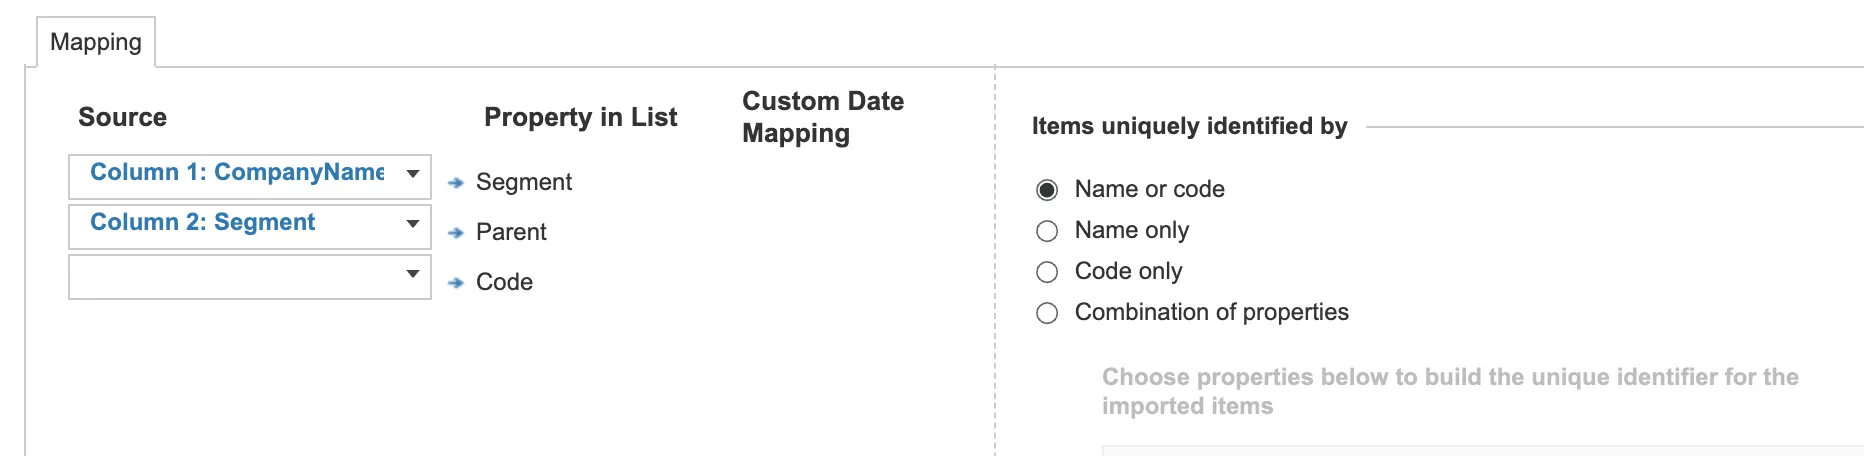
3. Set “Items uniquely identified by”
Section titled “3. Set “Items uniquely identified by””Leave it as:
- Name or code
4. Run the Import
Section titled “4. Run the Import”Anaplan will automatically:
-
Create parents from the Segment column
-
Create child items from the CompanyName column
-
Build the full parent-child hierarchy
No additional steps needed.
5. Save and Rename the Import Action
Section titled “5. Save and Rename the Import Action”Go to Model → Actions and rename the newly created import to something clear like: Import Company–Segment Hierarchy from Nexadata
6. Verify the Results
Section titled “6. Verify the Results”In your list tree view:
-
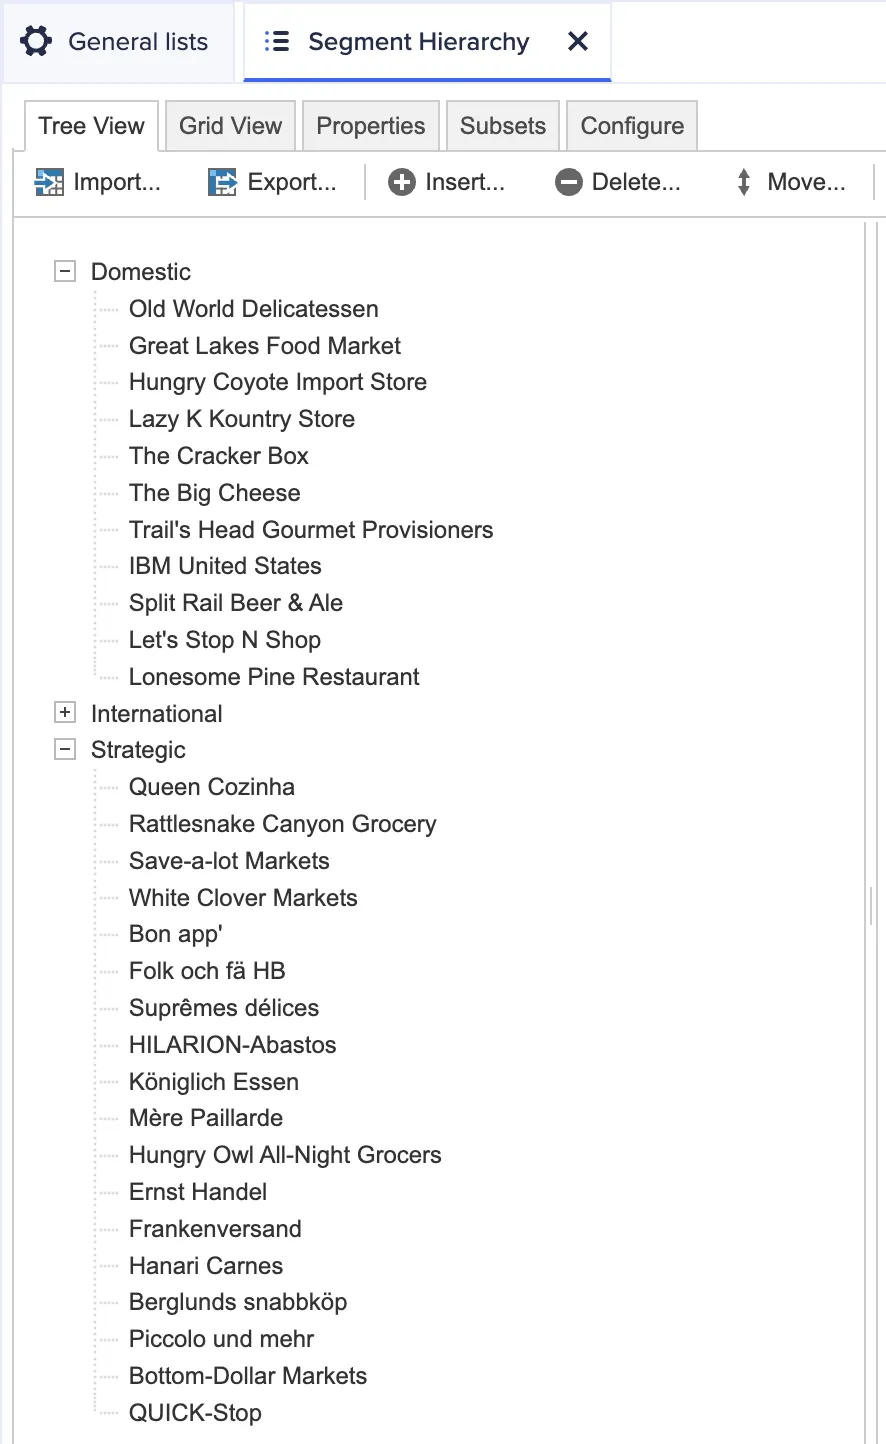
You should see the three parent items: Strategic, Domestic, International
-
Each CompanyName should appear nested beneath the correct Segment
-
No orphan items or errors