

Nexadata Connector Copilot
The Nexadata Connector Copilot allows you to connect to any external system with an OpenAPI specification and extract data into a Nexadata dataset, without writing code. This article walks you through the full process, from launching the copilot to finalizing your dataset columns.
With over 20,000 public APIs available on directories like APIs.guru, no two connections look exactly the same. Connector Copilot dynamically adjusts its interface based on the OpenAPI spec you provide, so the fields, authentication options, and configuration parameters you see will vary depending on the API you are connecting to. Some platforms like Google BigQuery also extend the standard OAuth flow with additional parameters specific to their platform. Connector Copilot supports these specializations natively, so you can connect to major platforms even when they go beyond the OpenAPI standard.
Step 1: Launch the Connector Copilot
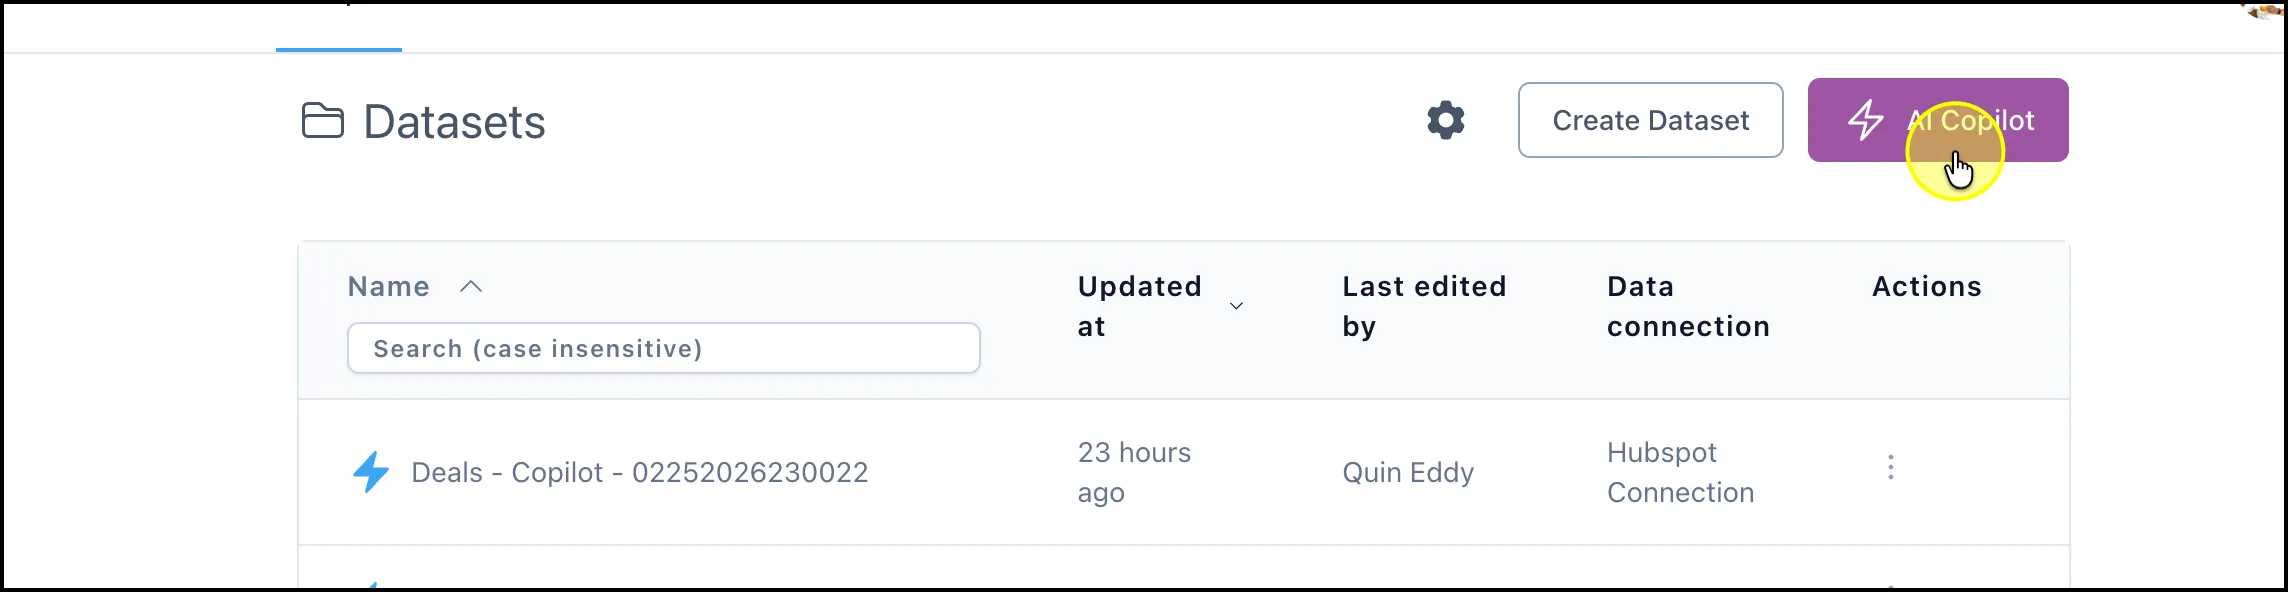
Section titled “Step 1: Launch the Connector Copilot”From the Datasets page, click the AI Copilot button in the top right corner to open the Connector Copilot.
Step 2: Load Your OpenAPI Specification
Section titled “Step 2: Load Your OpenAPI Specification”Connector Copilot supports three ways to load your API specification. Select the option that matches what you have available:
-
Existing Data Source: connect to a data source you have already configured
-
Upload API Specification: upload a YAML or JSON file directly from your computer
-
API Specification URL: paste in a public URL pointing to your OpenAPI spec

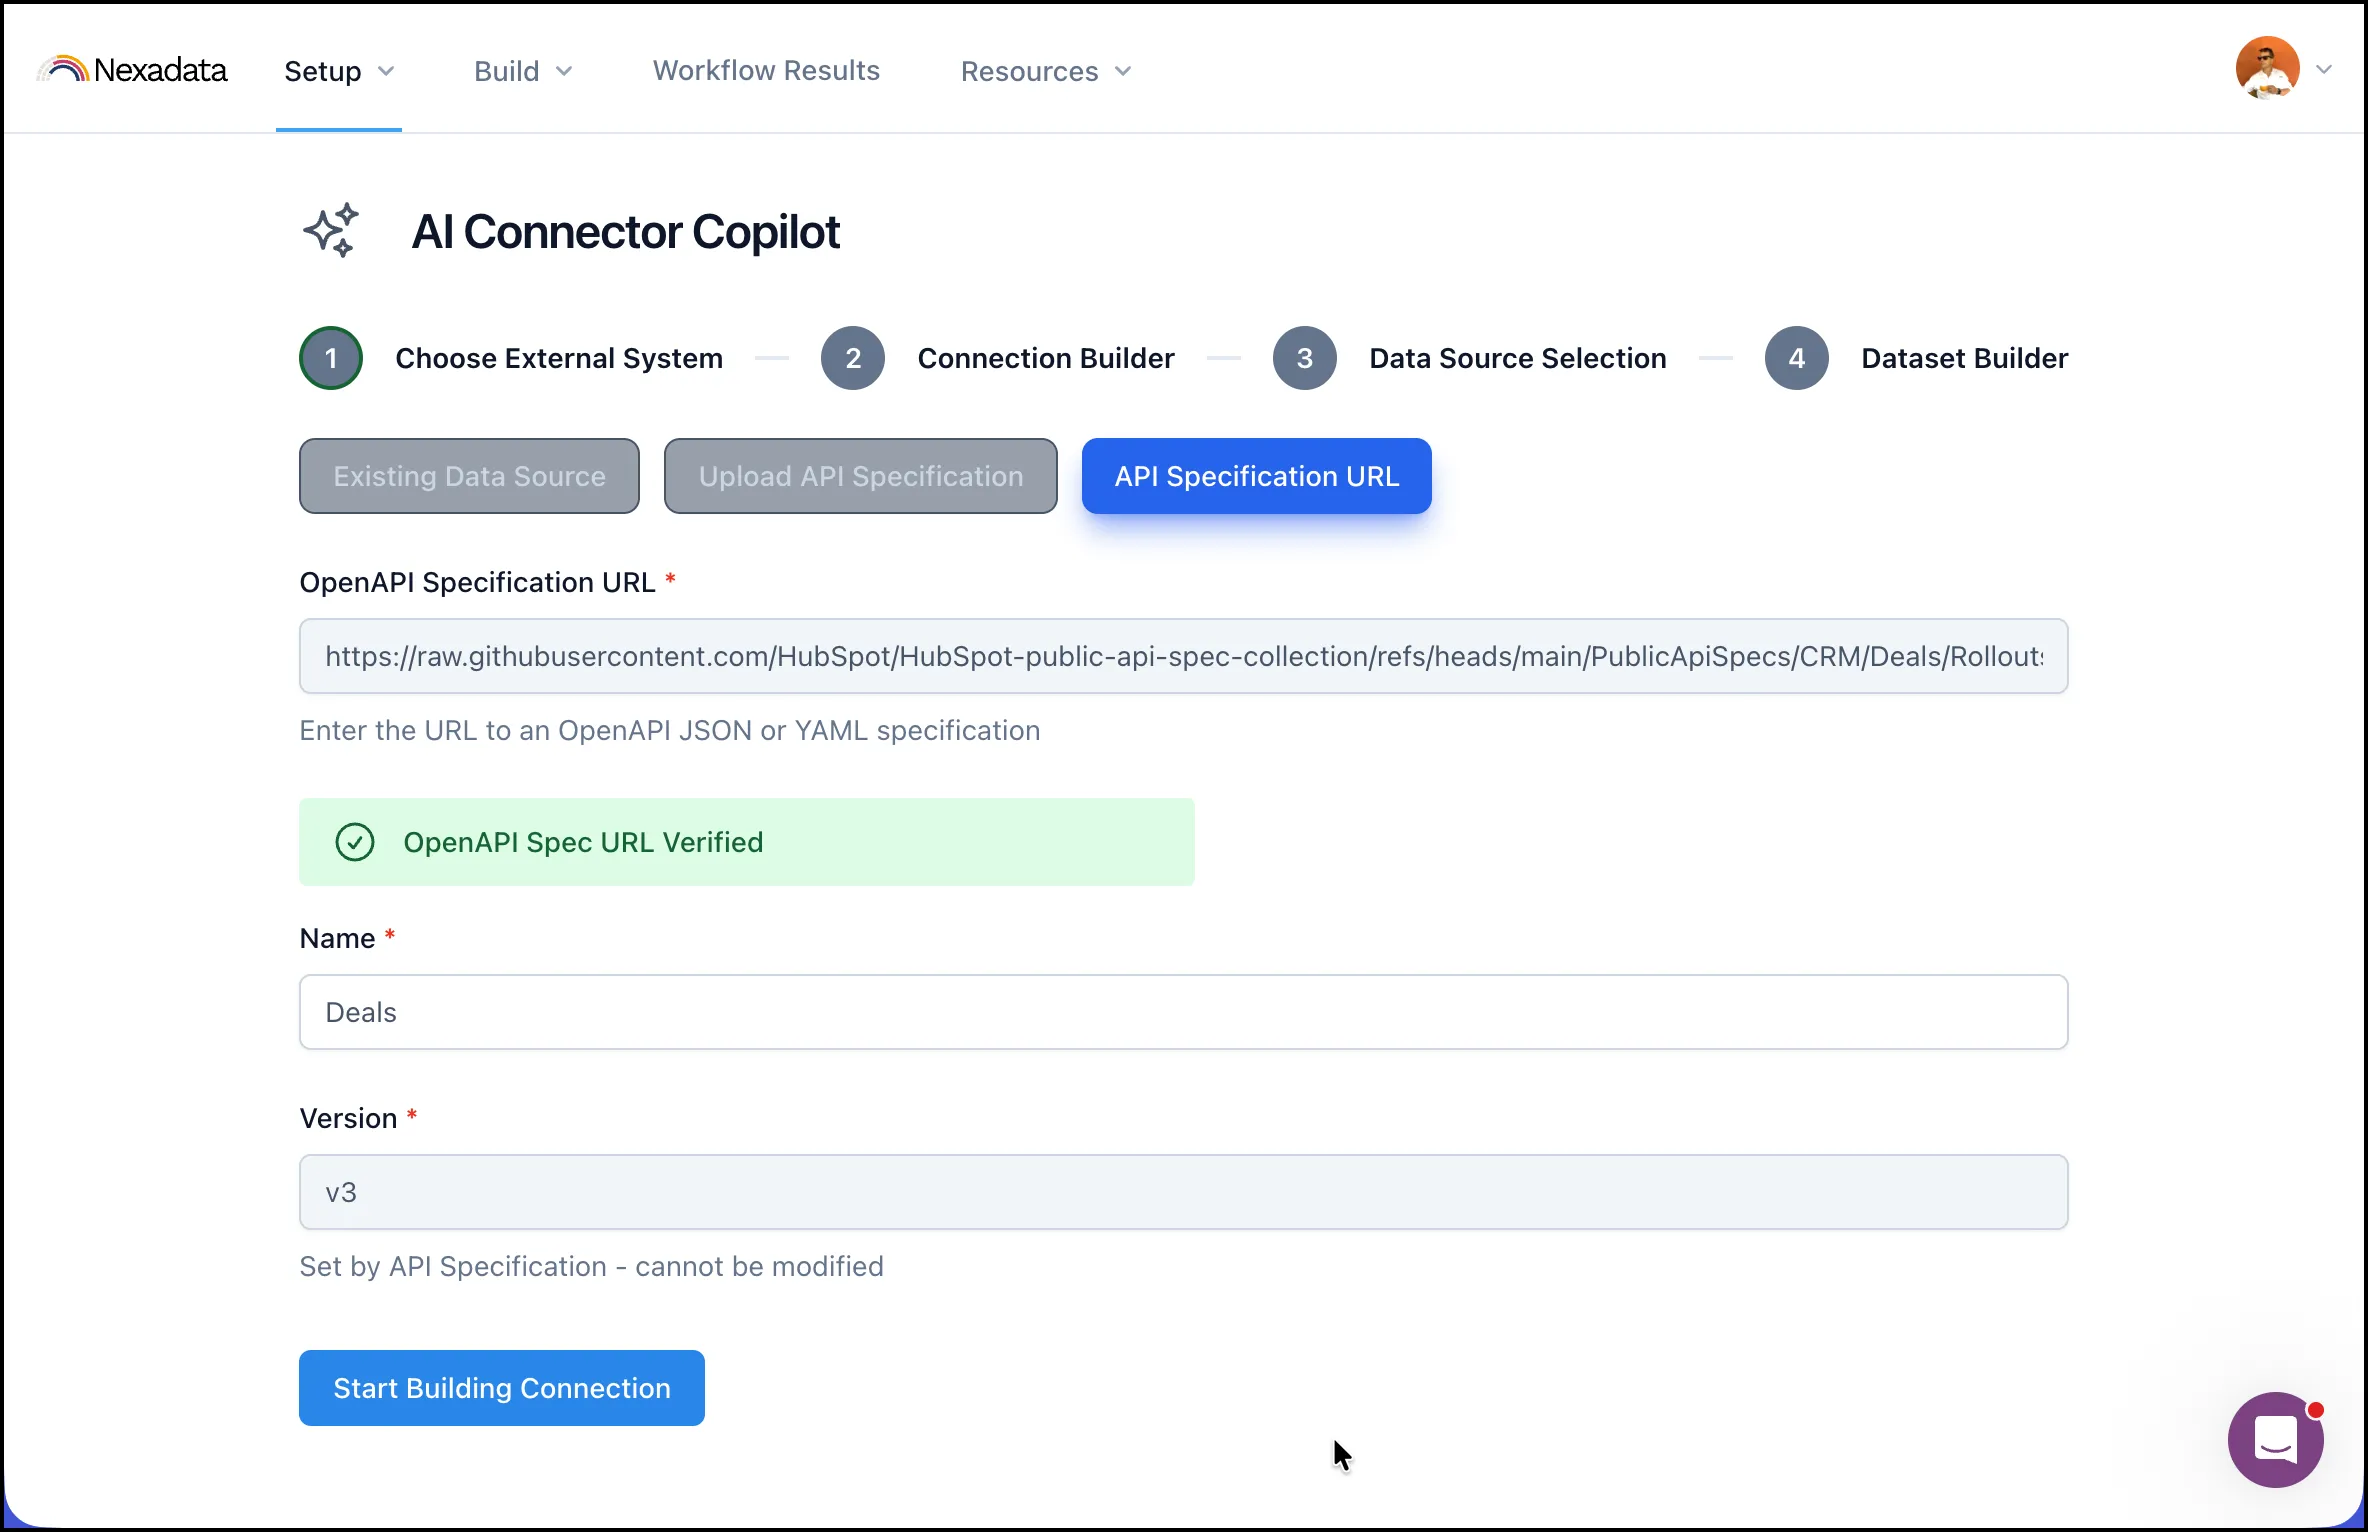
Once the spec is validated, click Start Building Connection.
Step 3: Choose an Authentication Method
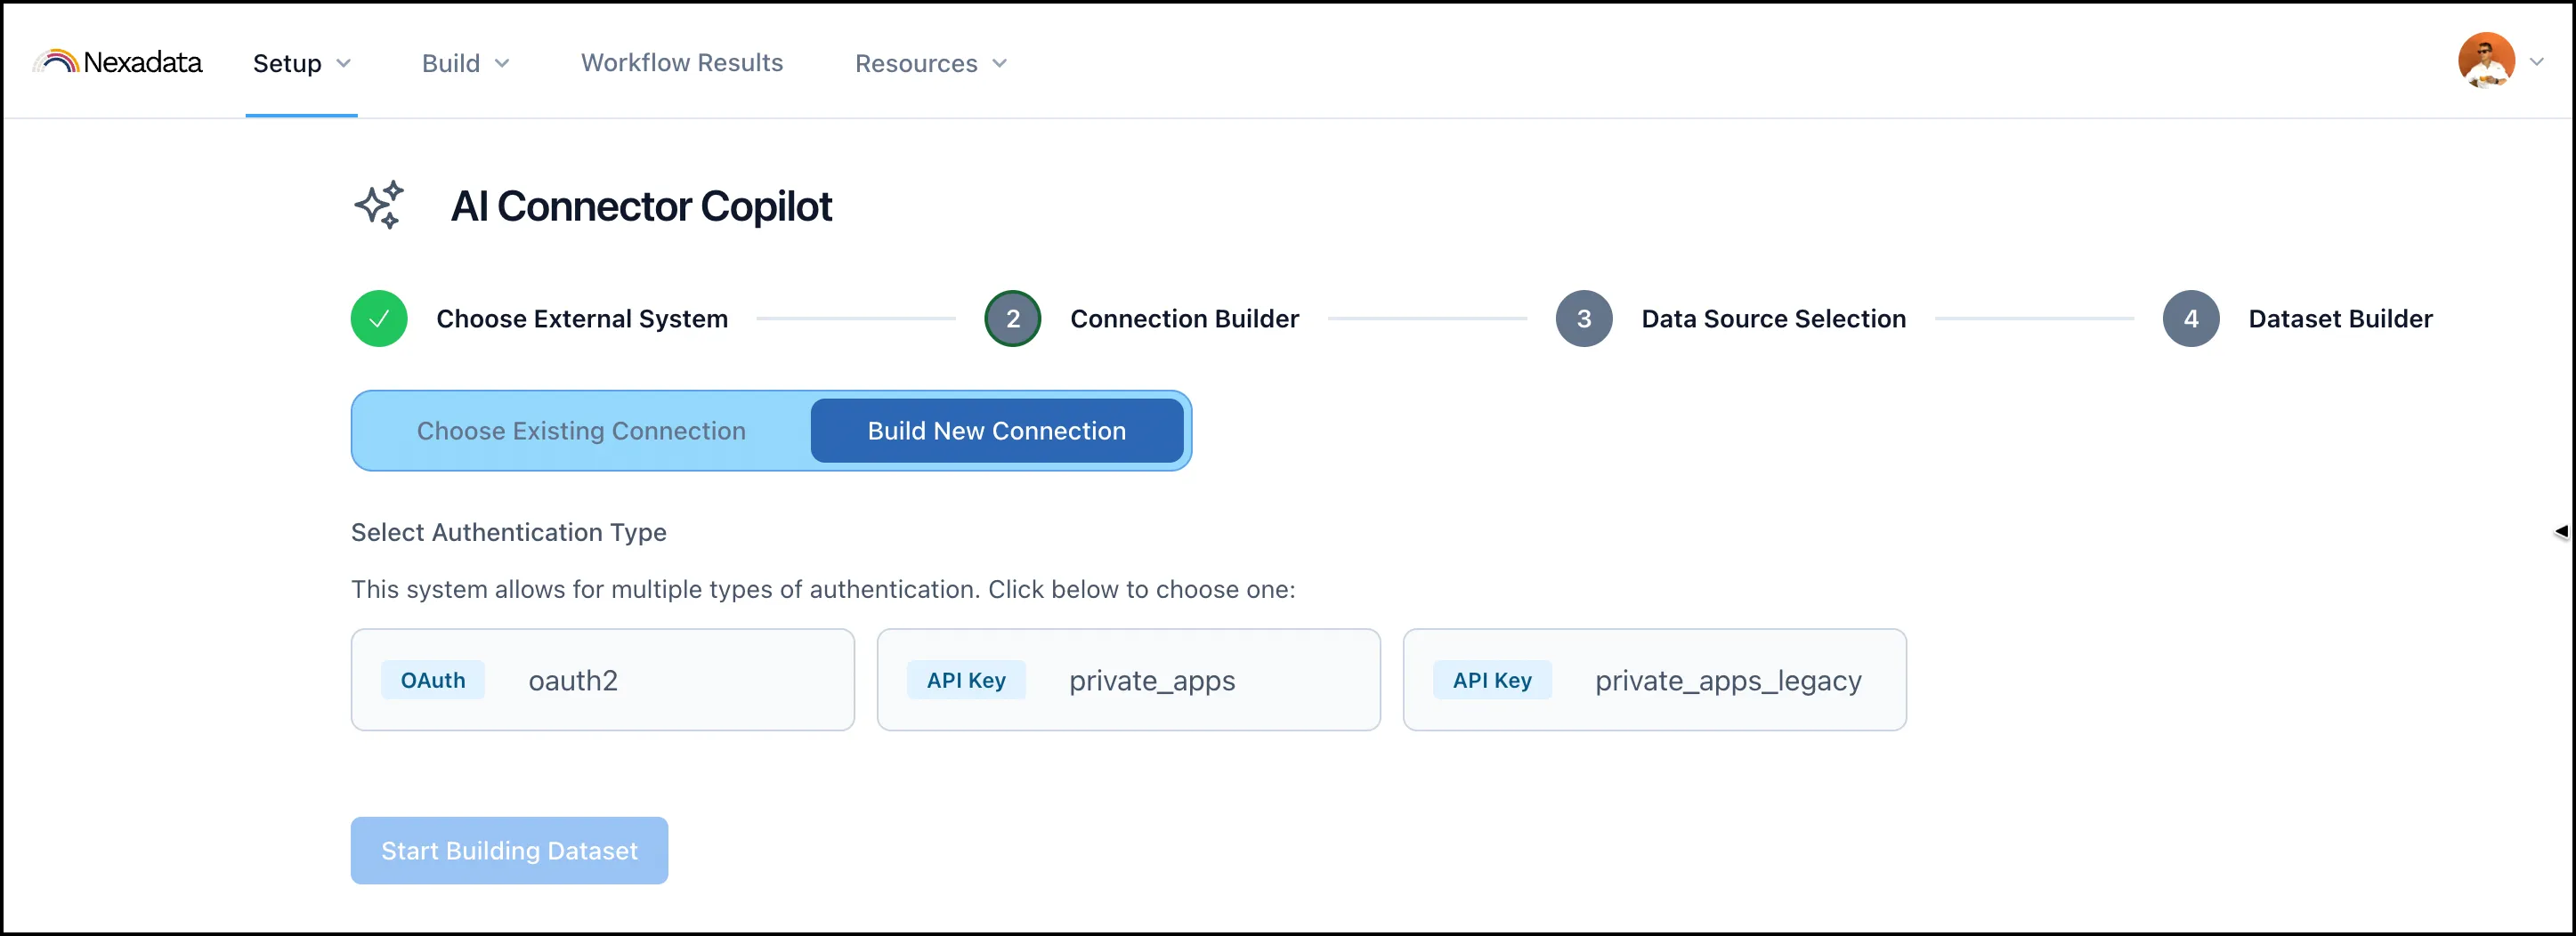
Section titled “Step 3: Choose an Authentication Method”Connector Copilot will detect the authentication options available in your OpenAPI spec. Select the method that applies to your data source:
-
OAuth: for providers that use OAuth 2.0 authorization flows
-
API Key: for providers that issue static API keys
-
Basic Auth: for username and password authentication
-
Private Apps: for platforms that use private application tokens
Step 4: Fill In Your Connection Credentials
Section titled “Step 4: Fill In Your Connection Credentials”Depending on your selected authentication method, complete the required fields. For OAuth connections, this includes:
-
Name: a label for this connection
-
Client ID: from your registered OAuth application
-
Client Secret: from your registered OAuth application
-
OAuth Scopes: the permissions required for the data you want to extract
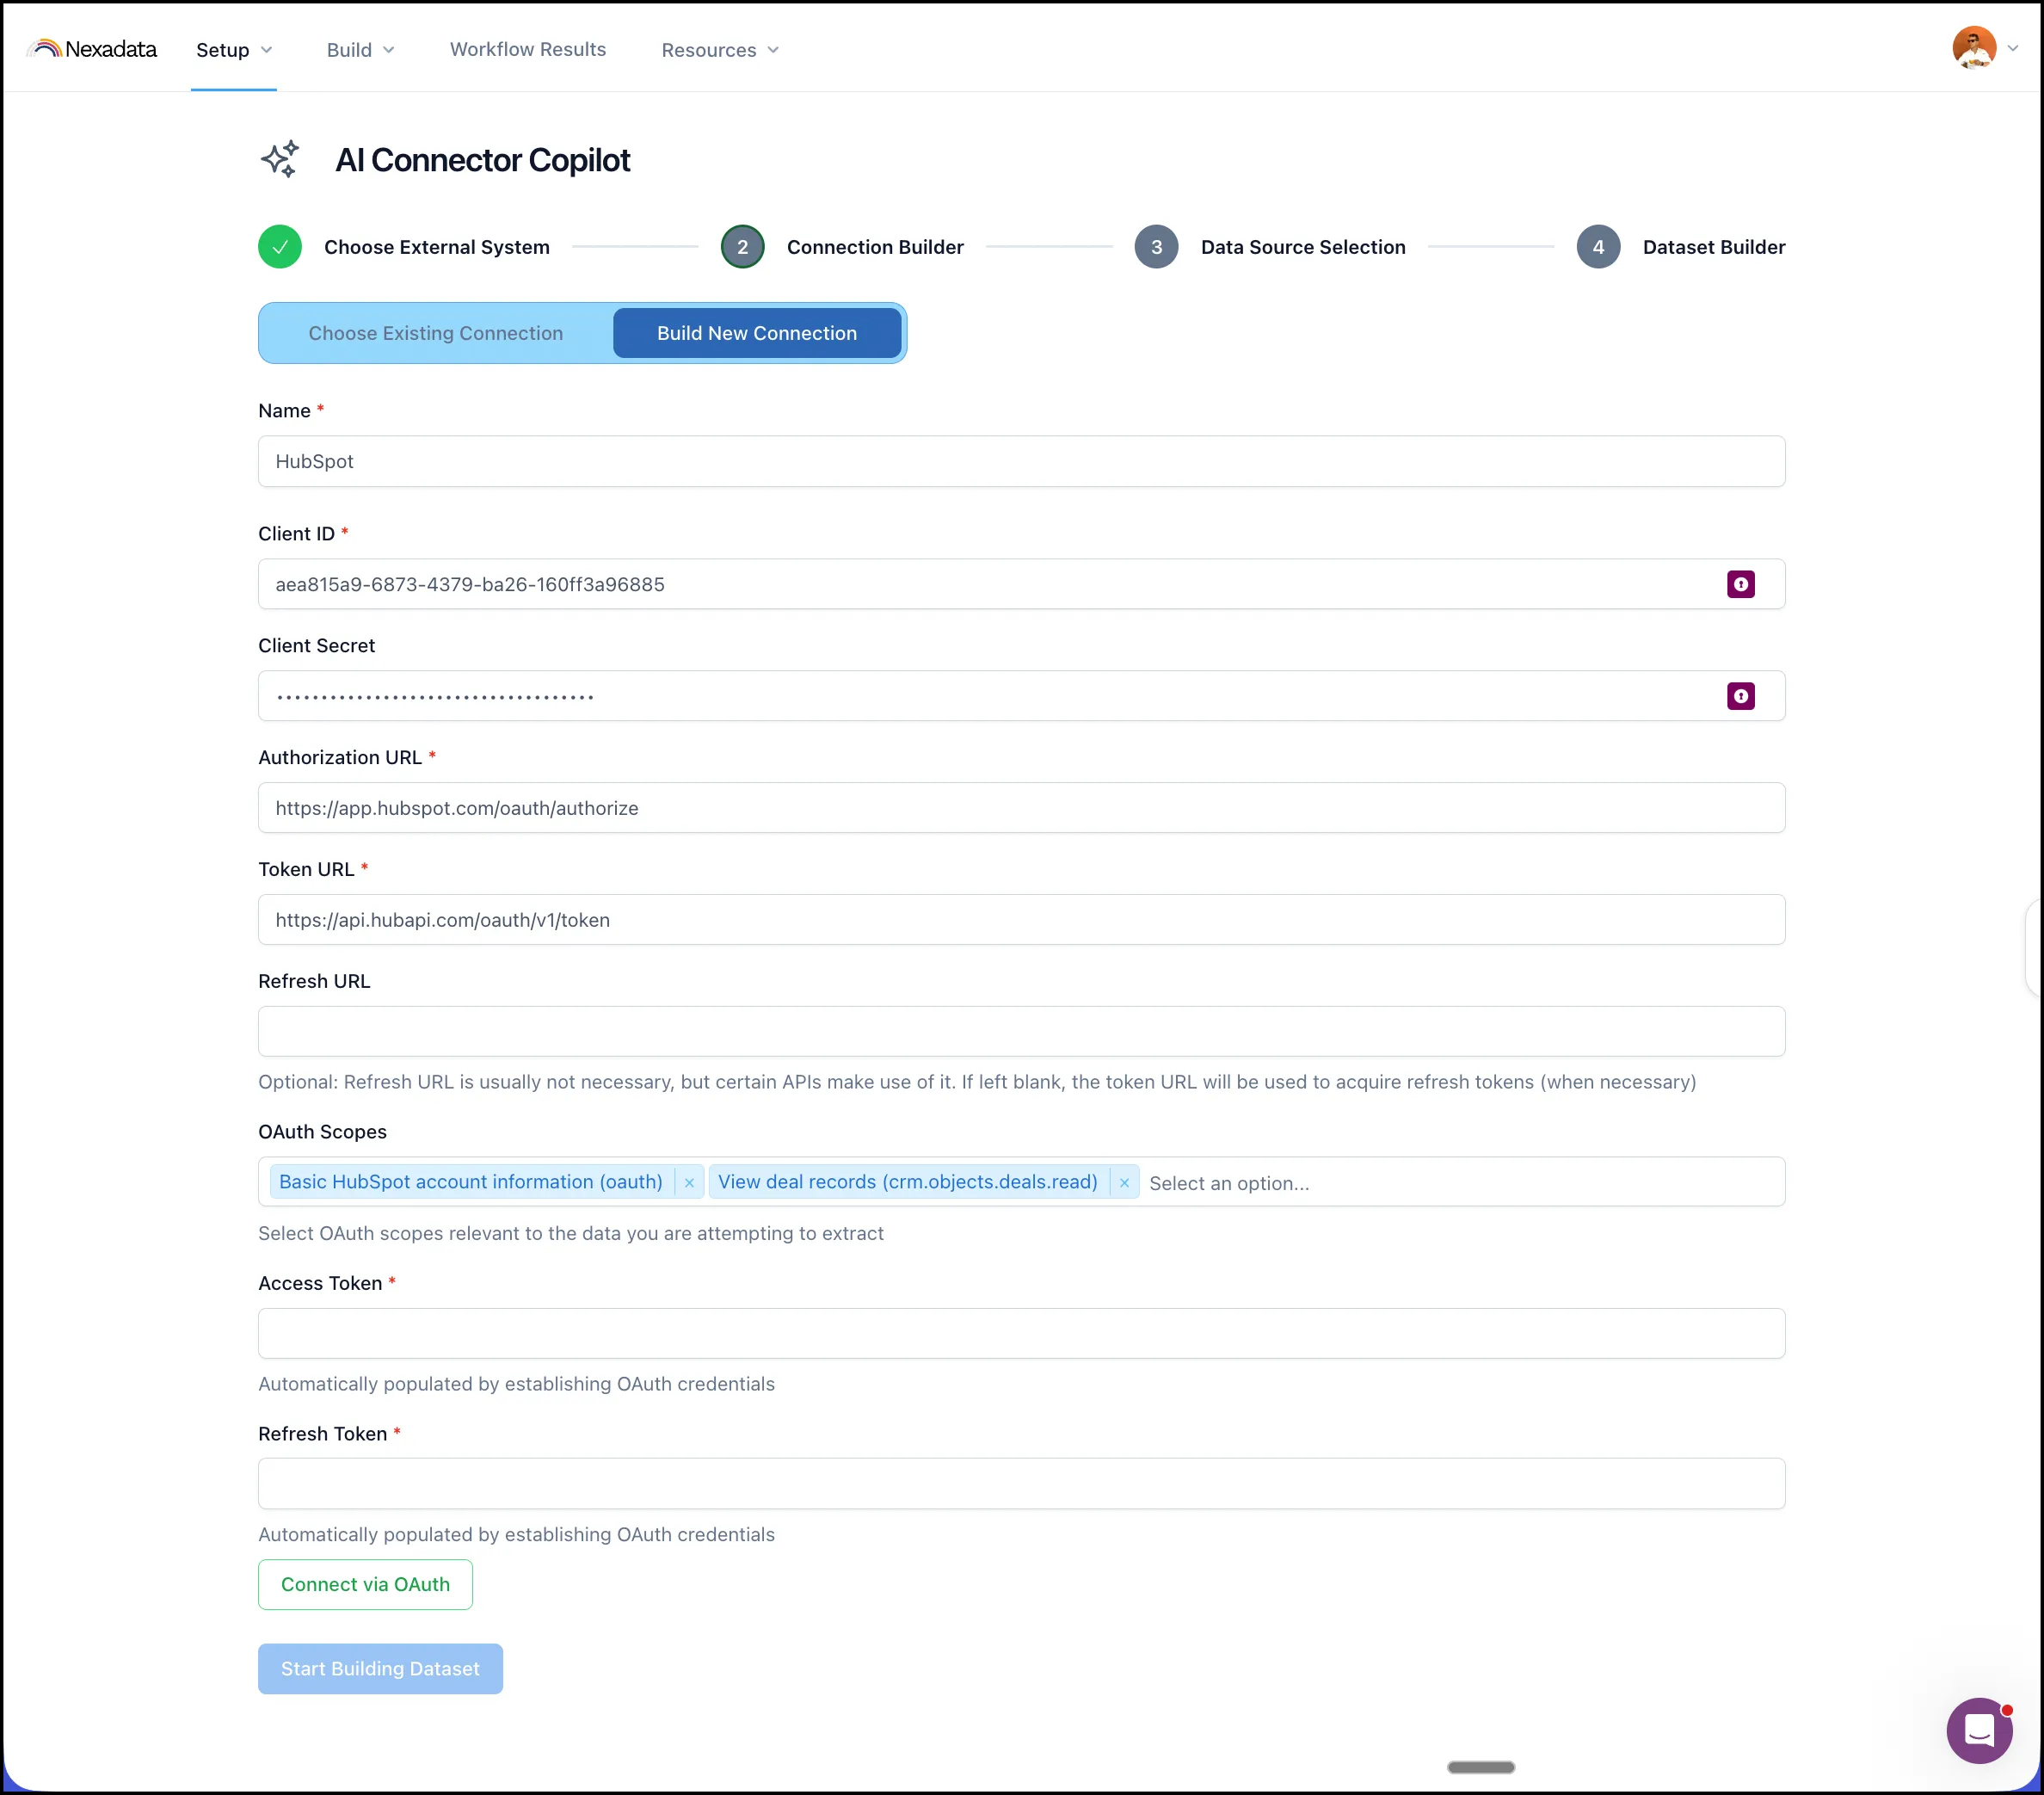
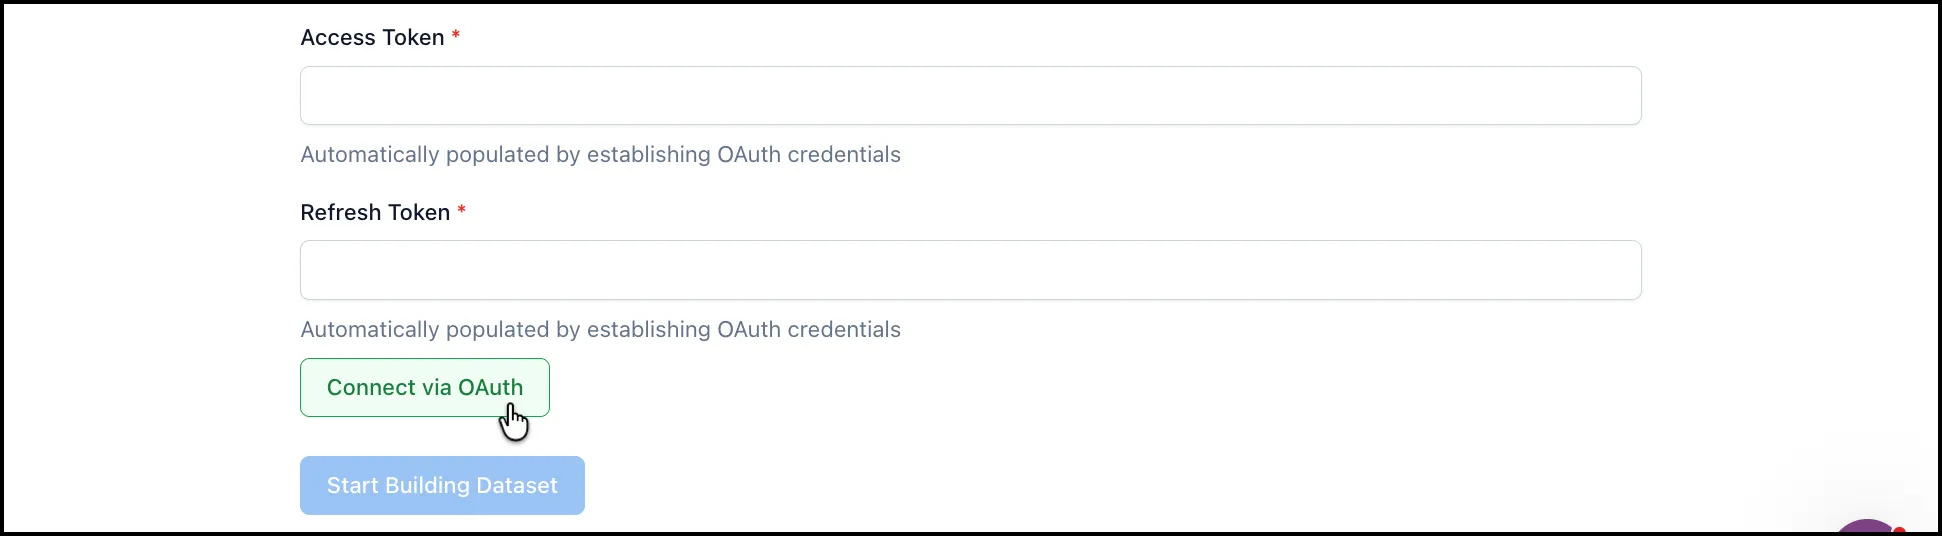
Once the fields are populated, connect to the API service based on the selected authentication method.
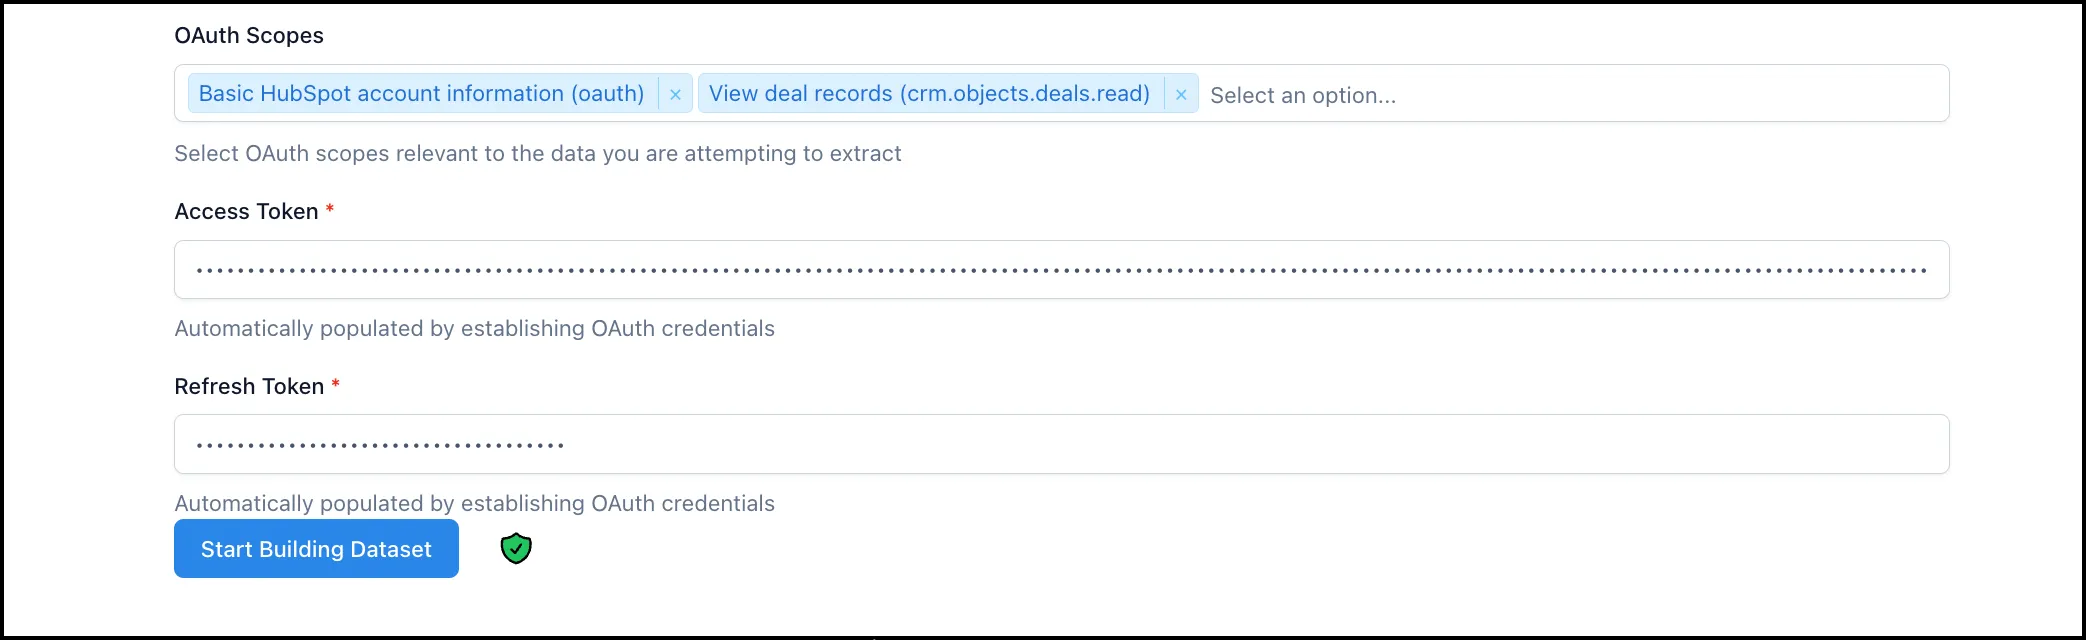
Once all required fields are complete, click Start Building Dataset at the bottom of the form.
Step 5: Describe the Data You Want
Section titled “Step 5: Describe the Data You Want”On the Data Source Selection screen, describe the data you want to extract in plain language. Be as specific as you need - including field names, filters, or other context - to help Connector Copilot select the right API endpoint.
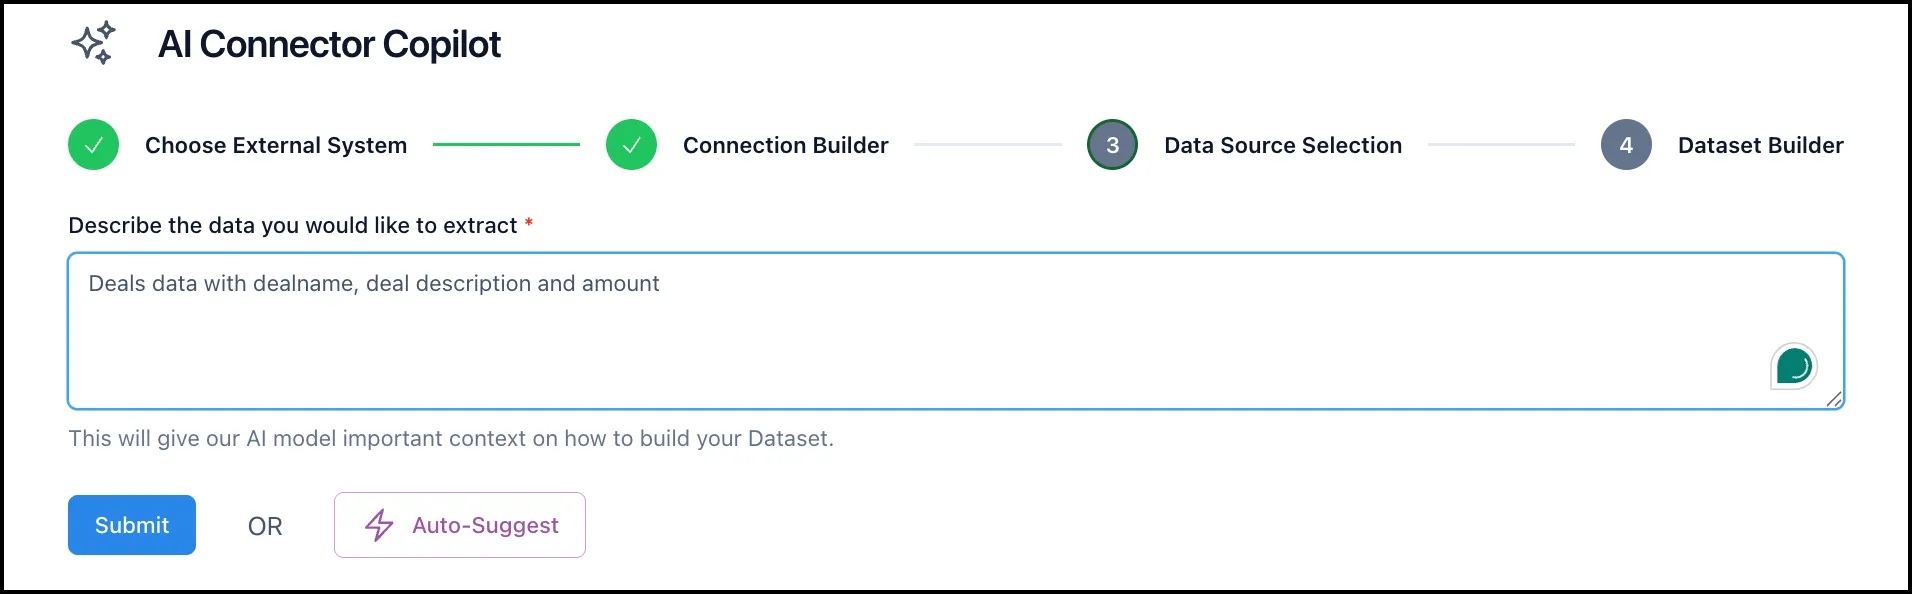
Click Submit to continue, or click Auto-Suggest to let Connector Copilot recommend a description based on your spec.
Step 6: Select the API Endpoint
Section titled “Step 6: Select the API Endpoint”Based on your description, Connector Copilot returns a list of relevant API endpoints from your spec. Review the options and select the endpoint that best matches the data you want.
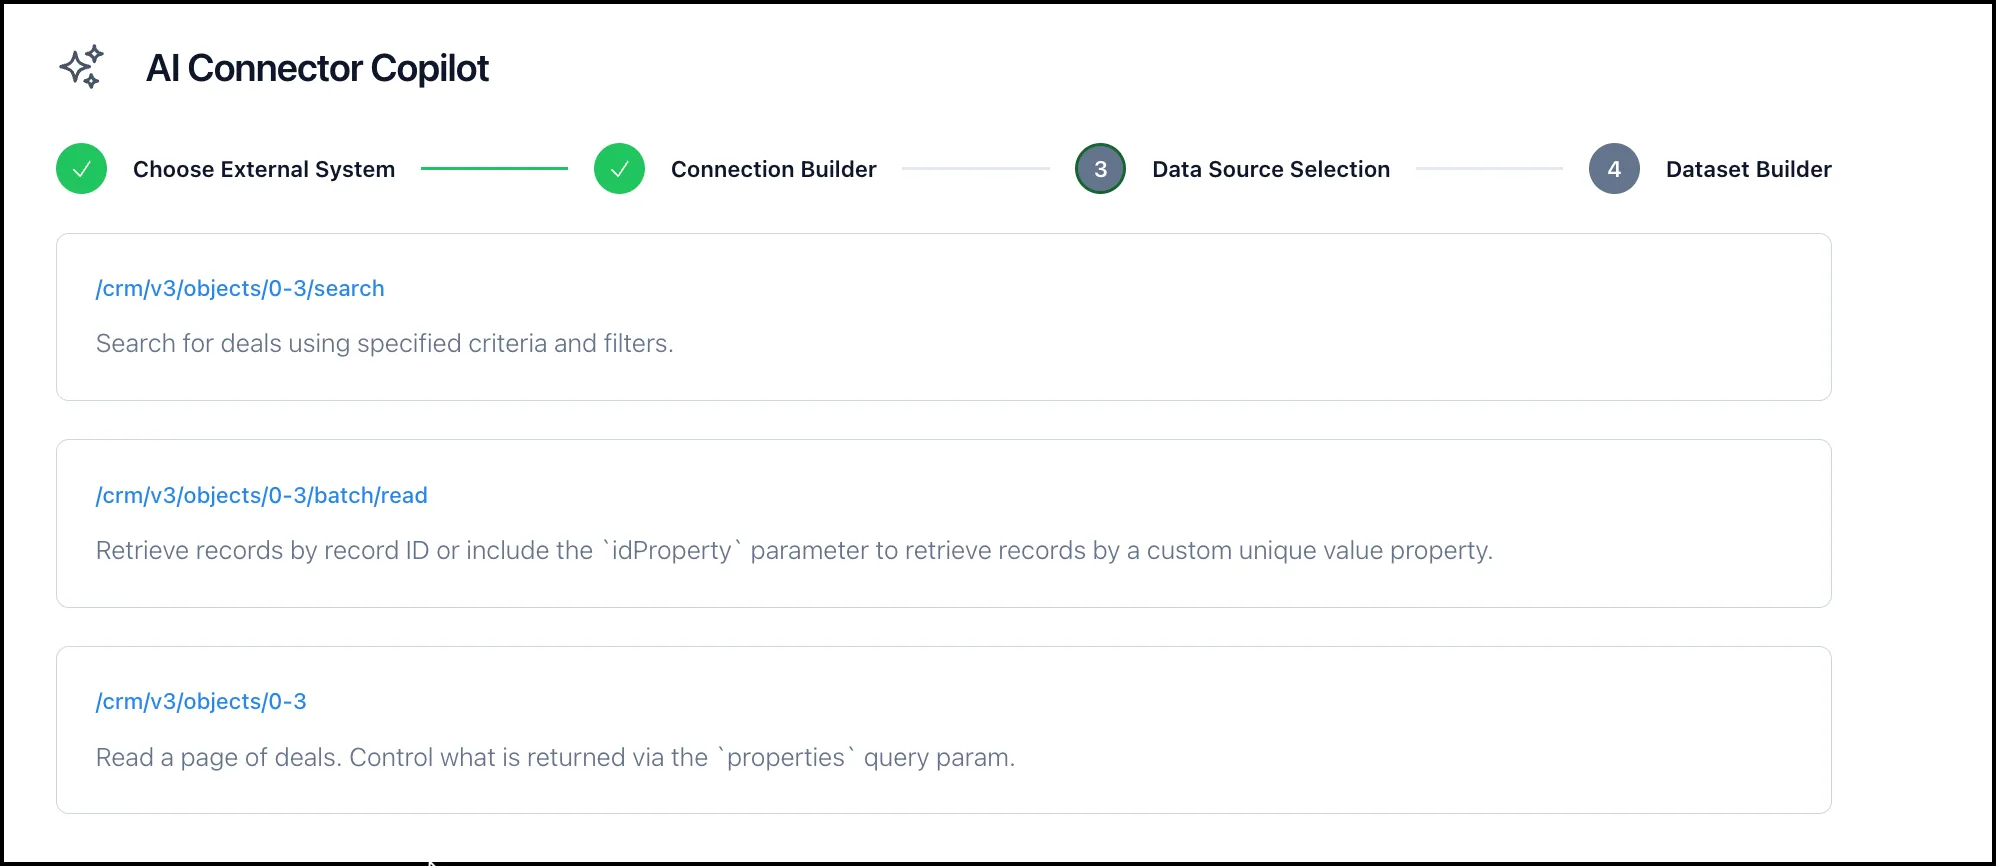
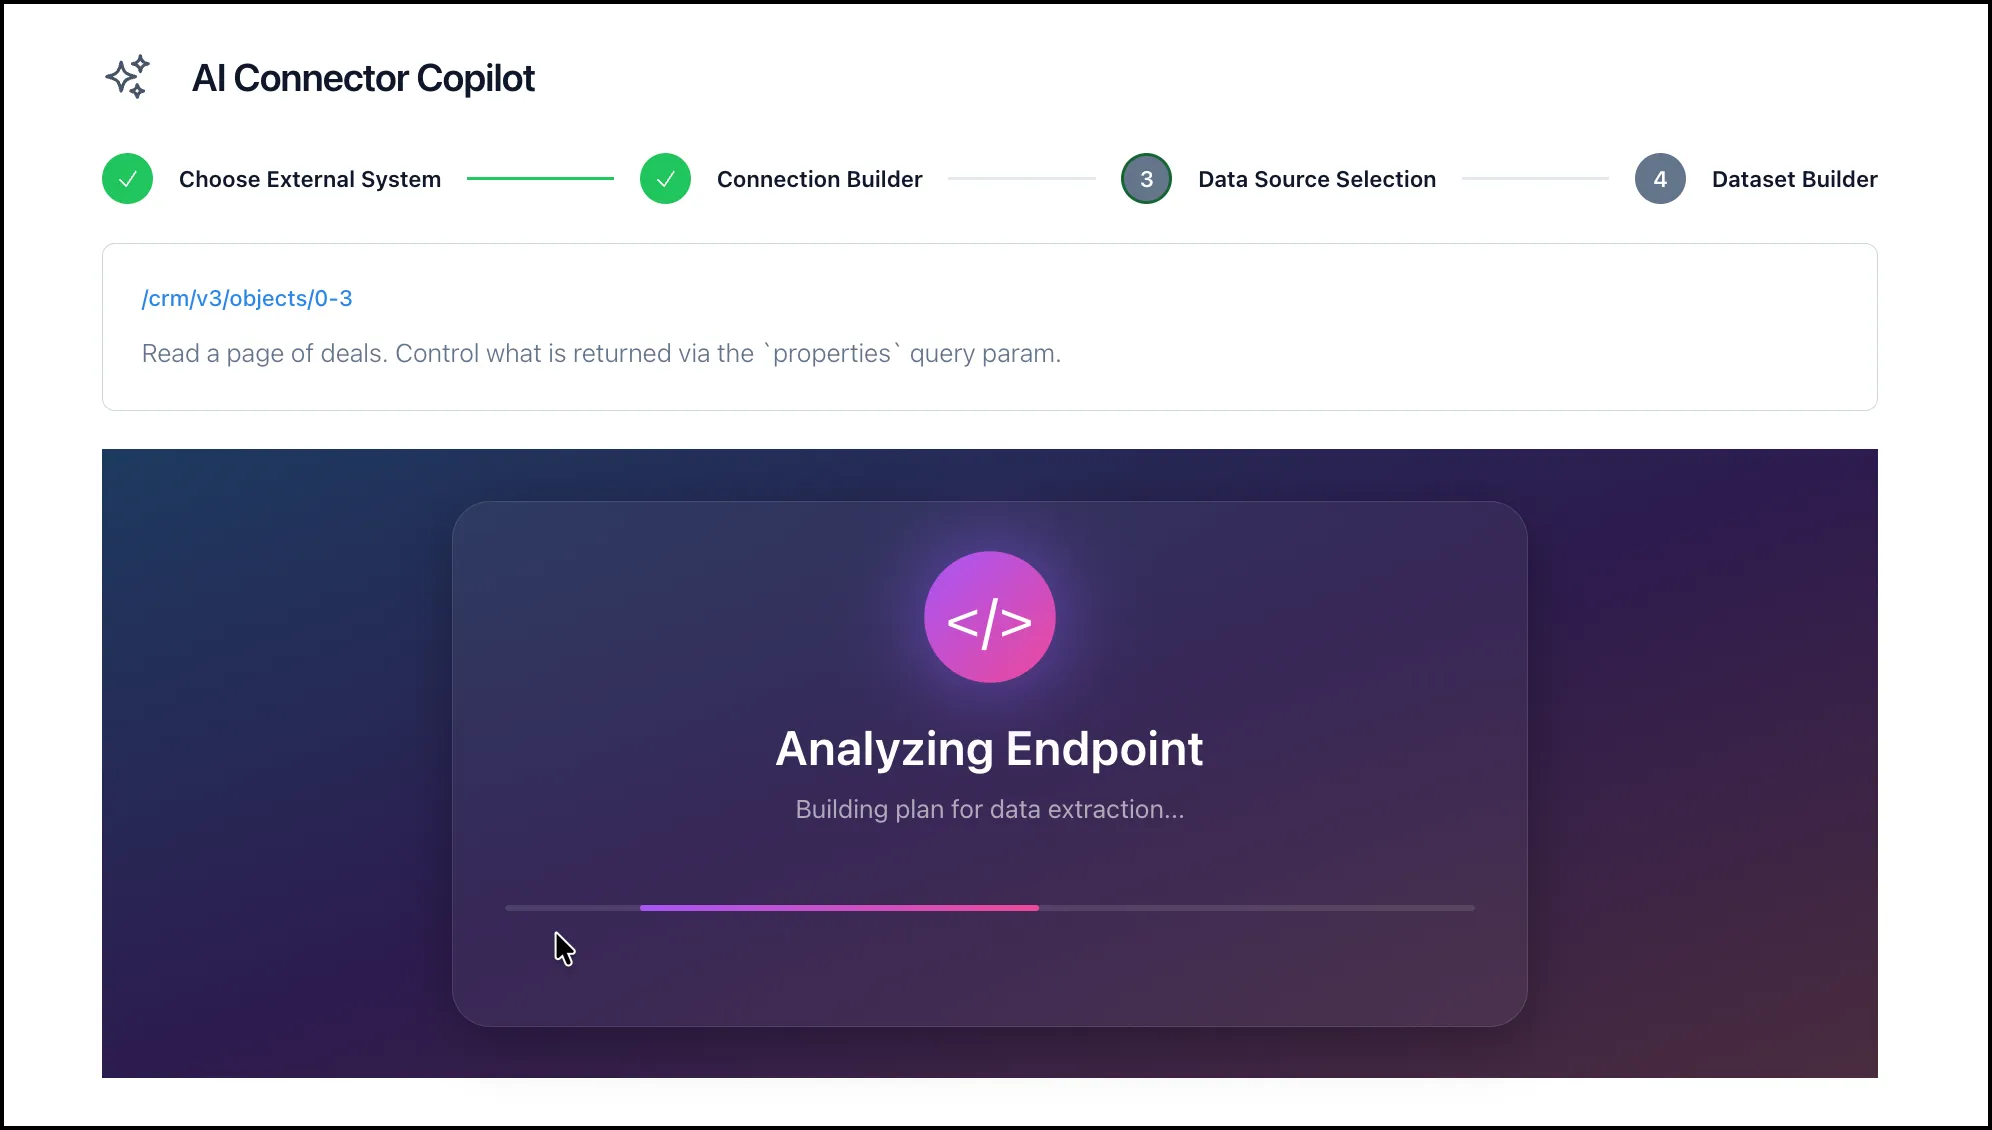
After selecting an endpoint, Connector Copilot analyzes it in combination with your prompt to determine how to structure the dataset.
Step 7: Refine the Dataset Request
Section titled “Step 7: Refine the Dataset Request”Once the analysis is complete, you can refine the request parameters based on what the endpoint supports.
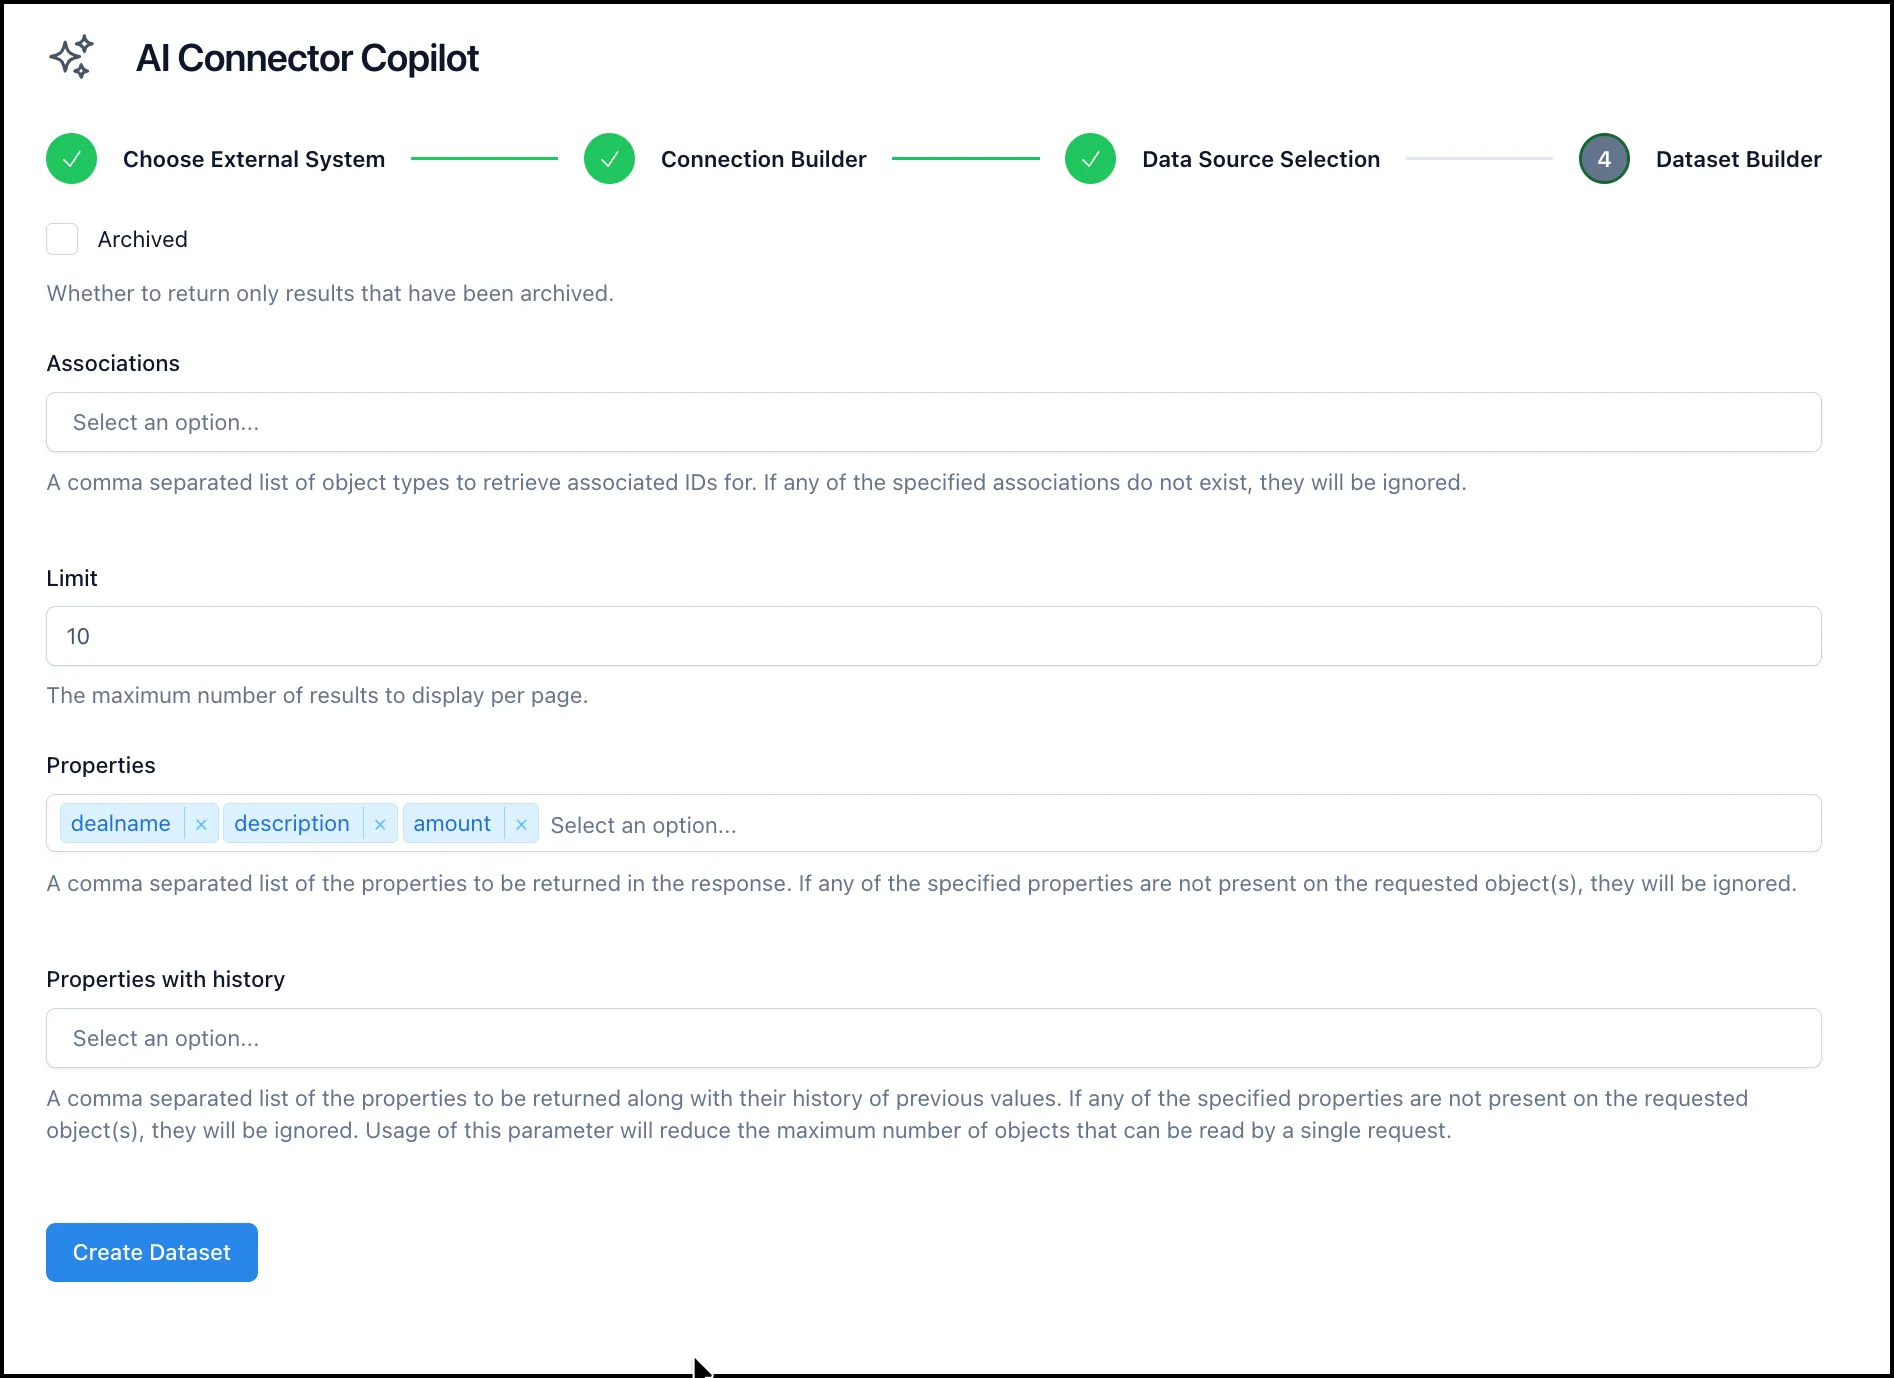
When your parameters are set, click Create Dataset.
Step 8: Advanced Configuration Access
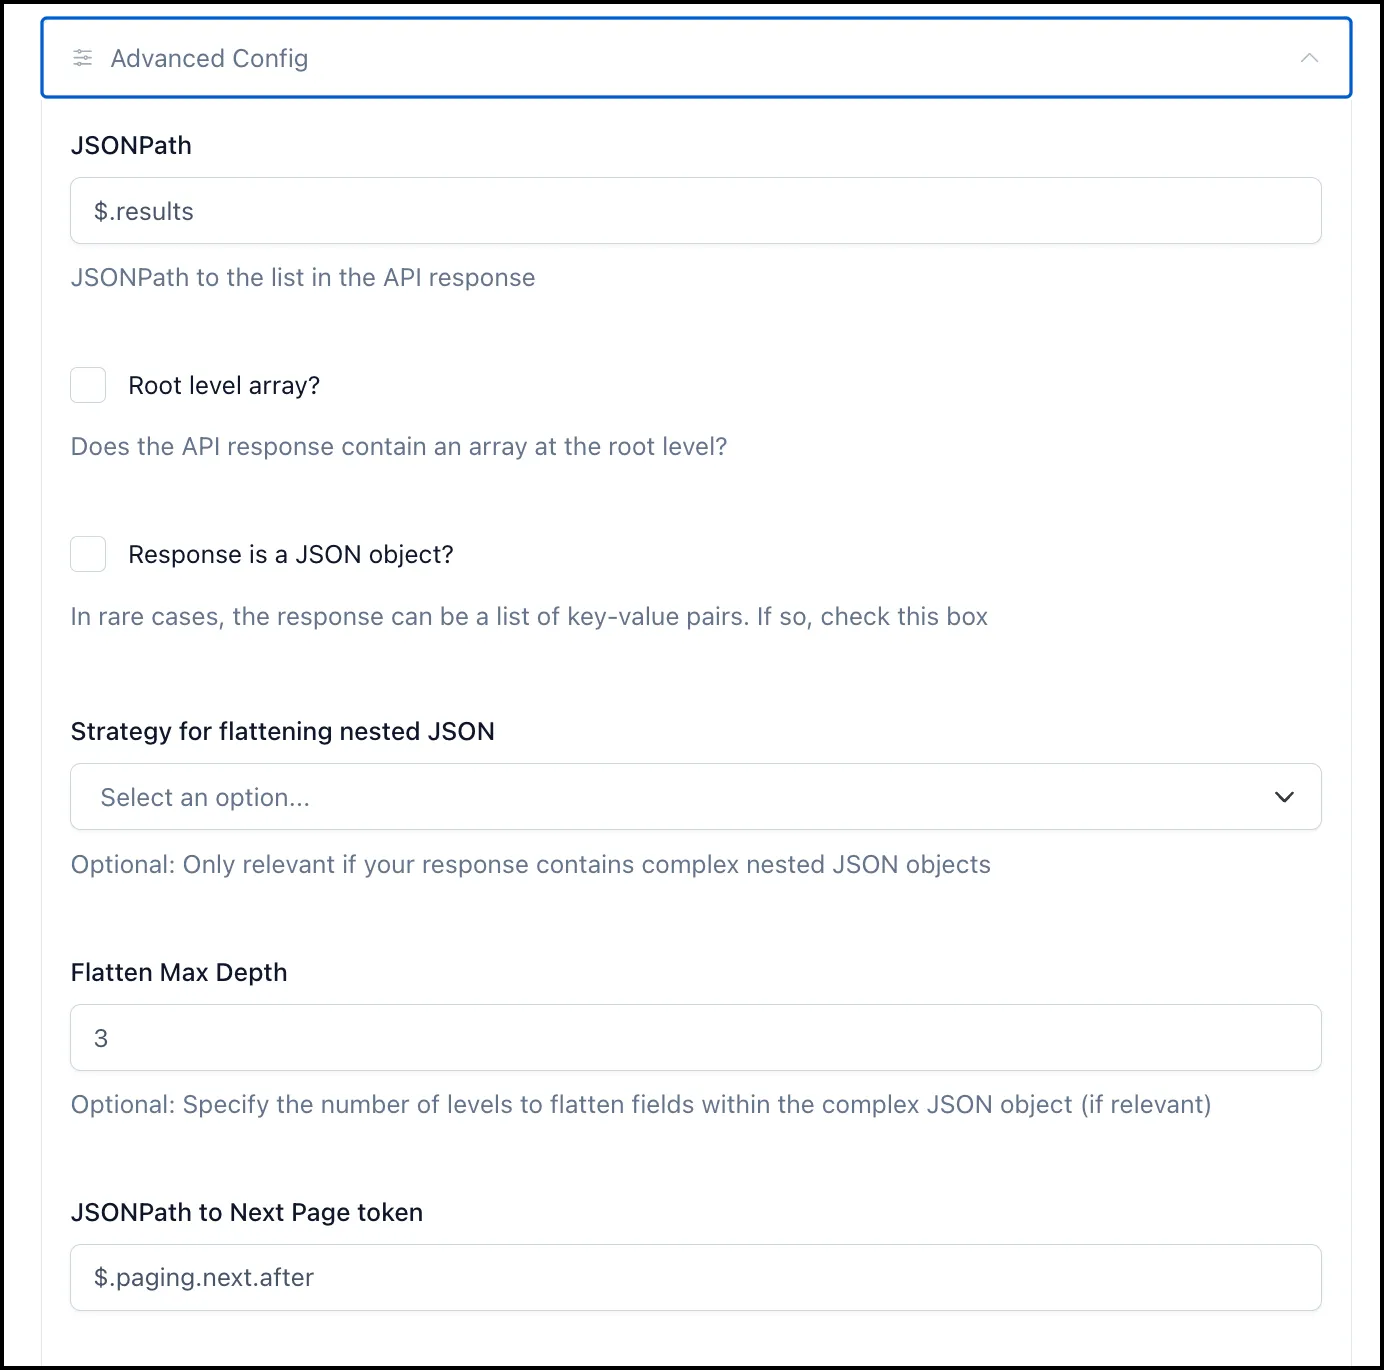
Section titled “Step 8: Advanced Configuration Access”Power users and those with API-level knowledge of their source systems can access the advanced configuration settings directly within the Connector Copilot Dataset Builder. This provides full visibility into how Copilot is extracting data from an external system, including how nested objects are flattened. Intelligent defaults handle the vast majority of cases, but edge cases that require adjustments are now fully accessible without abandoning the Copilot experience.
Step 9: Define and Confirm Dataset Columns
Section titled “Step 9: Define and Confirm Dataset Columns”Connector Copilot returns the fields available from the endpoint and maps them to dataset columns. Review each column and use the Ignore toggle to exclude any fields you do not need.
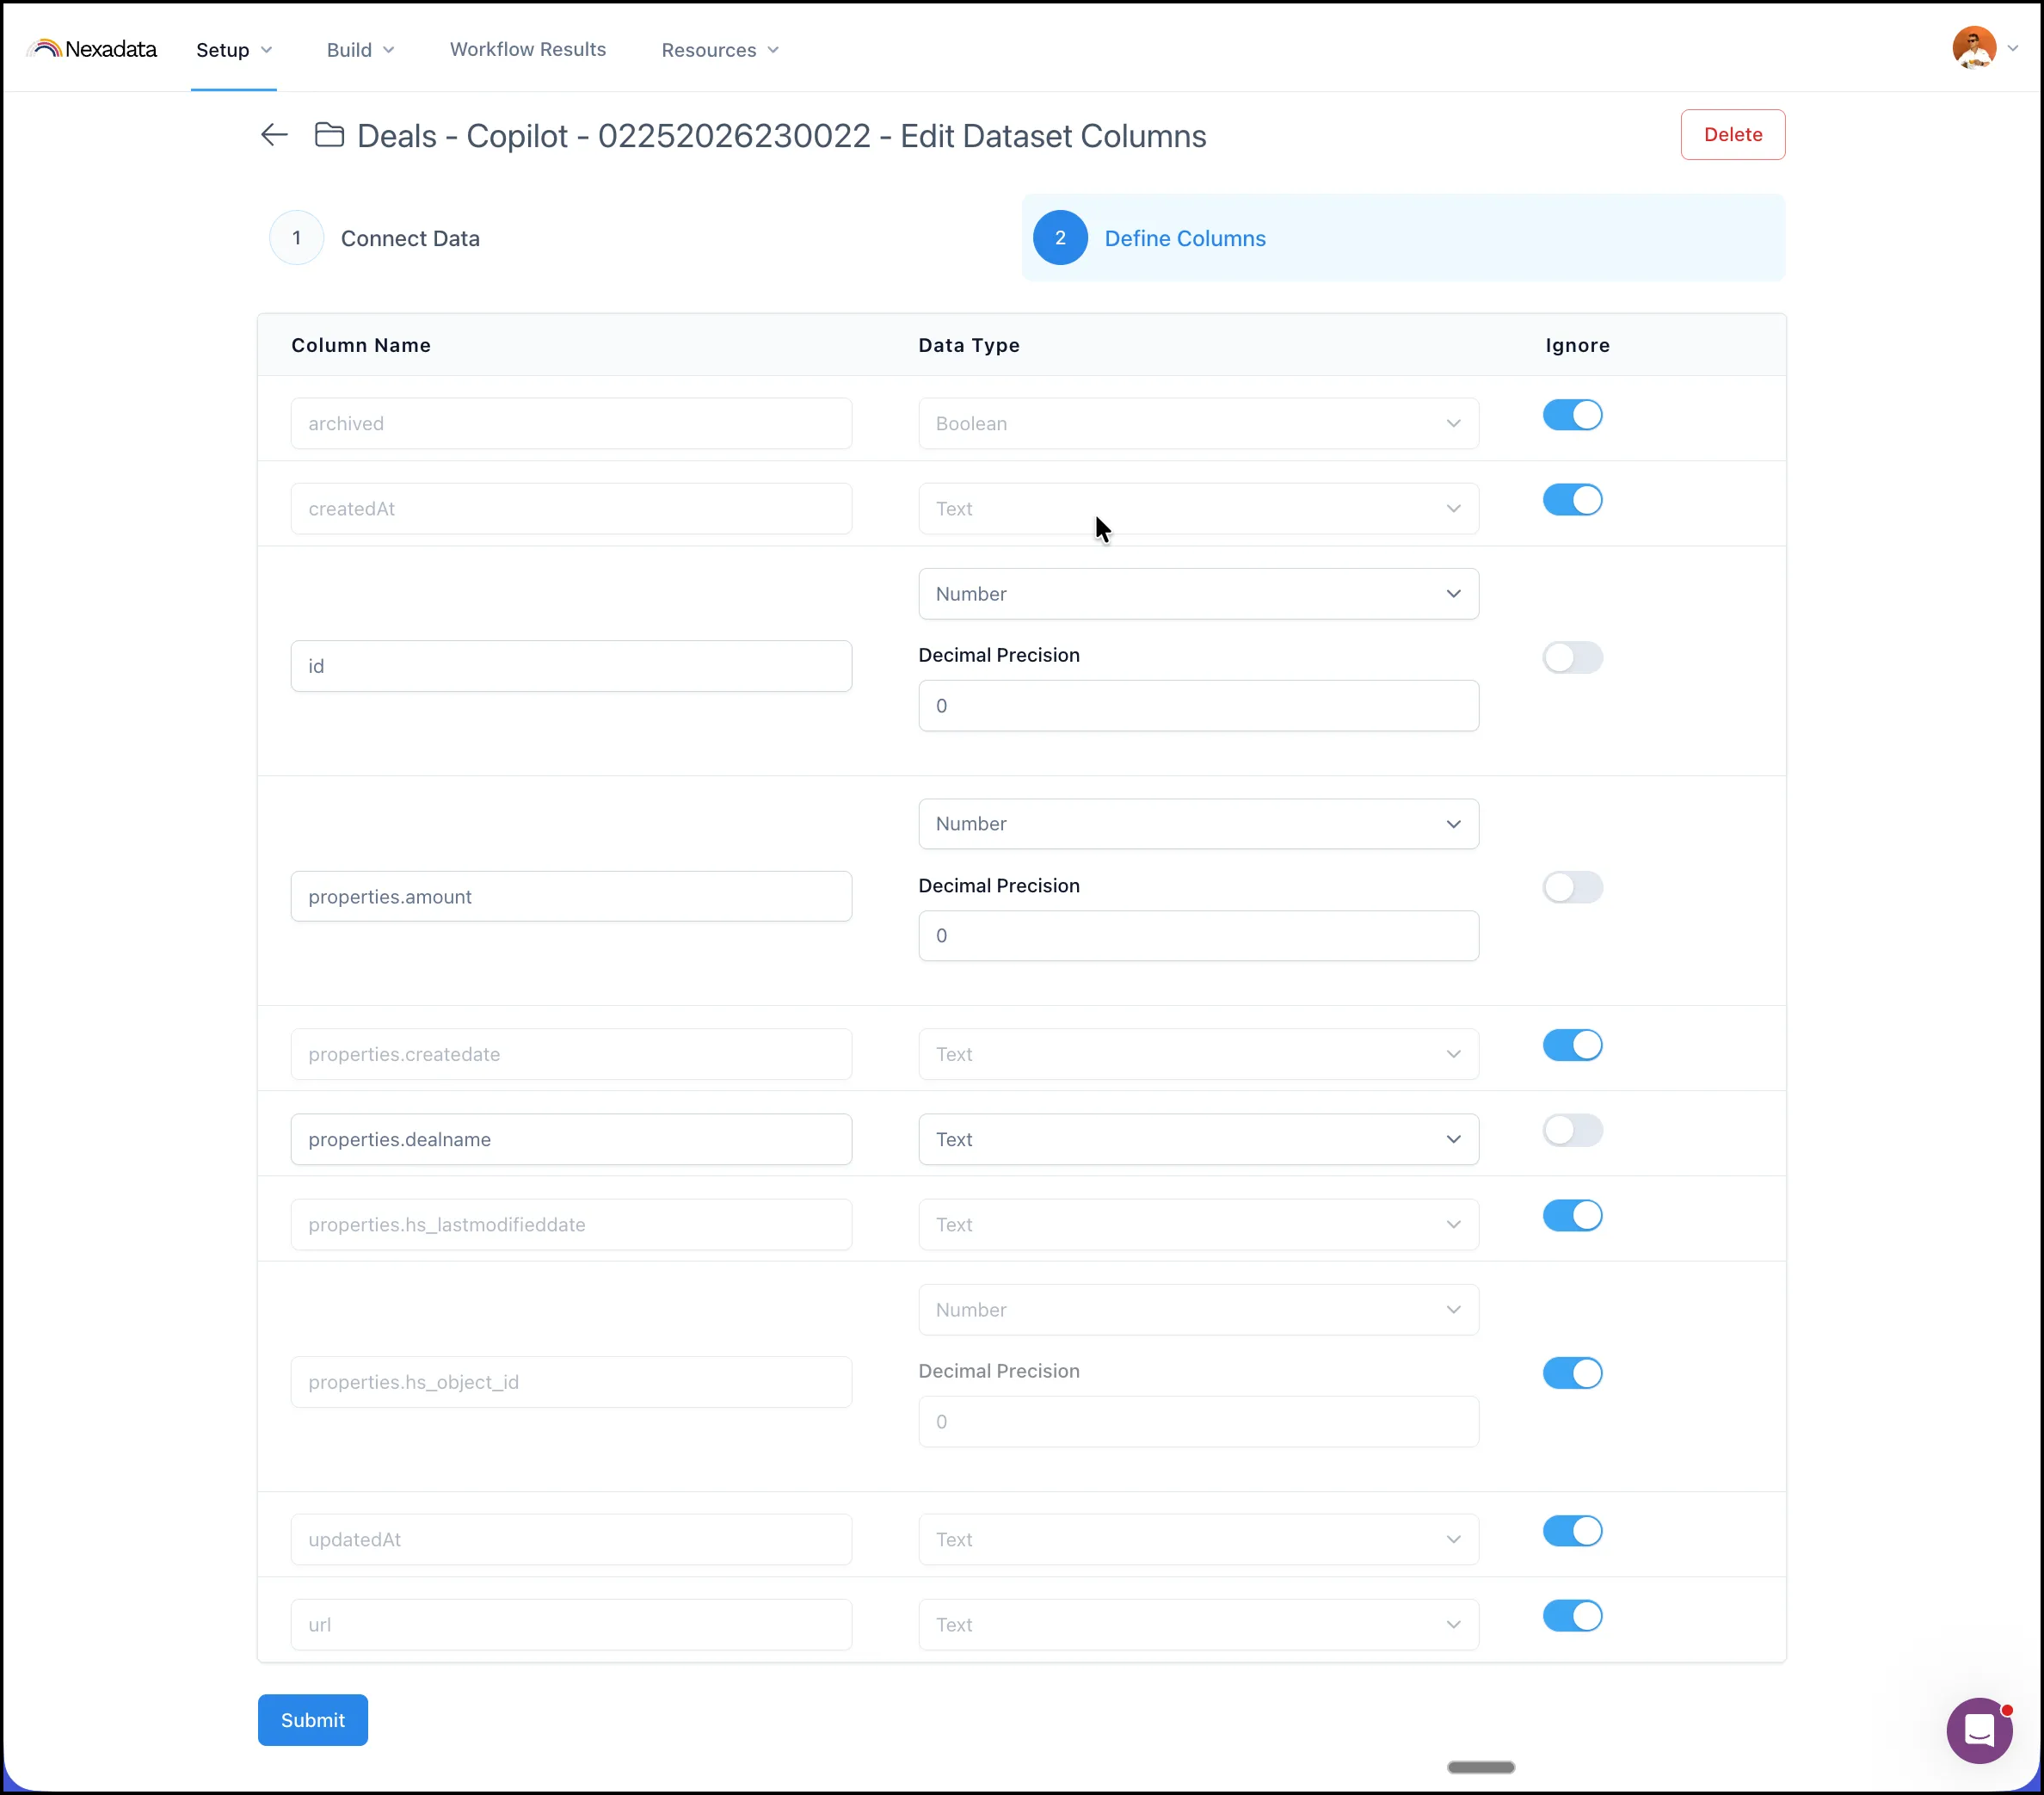
Your dataset will be created and available in Nexadata for use in pipelines, transforms, and workflows.